Search This Blog

Wednesday, October 30, 2013

"Handy" Treat Bags

Tomorrow is Halloween, and you're probably getting ready to have an overload of trick-or-treaters and candy munchers coming to your door. If you're the type of person that likes putting the candy in baggies, or if your kids have a party to attend, this is a great way to ditch the normal sandwich bag. I saw this idea on Pinterest and loved it!


You can find latex-free gloves at Walmart, Walgreens, etc. (the clearer the better).
When buying candy, be sure to get a big bag of Smarties candy, as you will need 5 rolls for each glove.
As far as the other candy, get whatever suits your fancy! :)


Cream Cheese Mushroom Bites

If you haven't noticed, I LOVE cream cheese! I use it often, in all kinds of recipes. :) Then you throw in some mushrooms and things get even better! This dish makes a great appetizer. One of my kids' favorite "meals" is "appetizer night" along with our Friday "movie night". We make a spread of snacks and make a meal out of it. Crackers and cheese, homemade jalapeno poppers, egg rolls, chips, veggies and dip, fruit with a dip, and whatever we come up with. This one will definitely be added to our menu of appetizers . :)

 (Sorry about the lack of pictures. I didn't think to "blog" this til after I made them.)


All you need is:

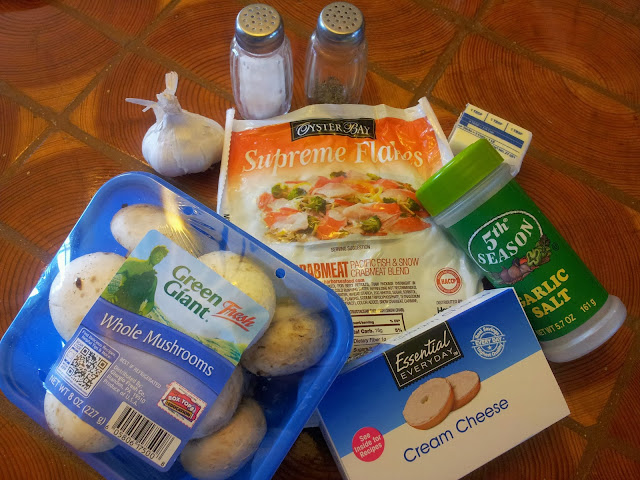
About 20 white mushrooms
 3 Tablespoons butter
 4 oz cream cheese, softened
 4 oz imitation crab meat, chopped
 2 cloves garlic, minced
 Salt, pepper, and garlic powder

Preheat oven to 350°.
Remove stems from mushrooms. Chop stems and reserve.
Place mushroom caps on baking sheet.
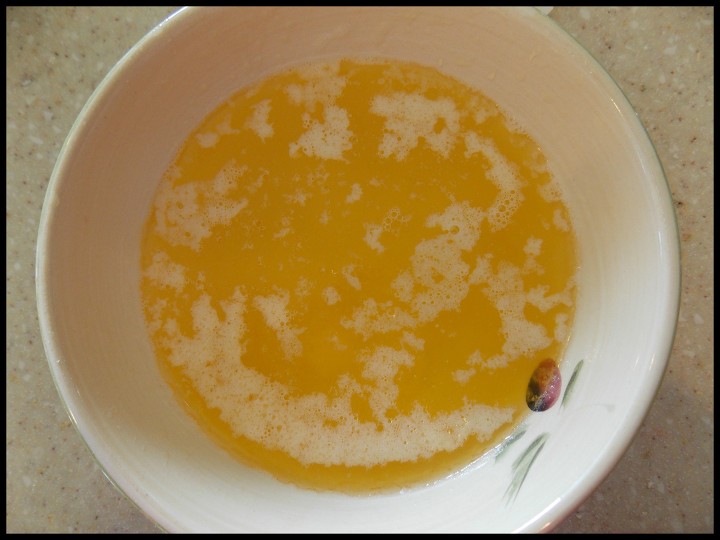
Melt butter in a small saucepan. Mix in garlic and cook until tender, about 5 minutes.
In a bowl, mix together mushroom stems, cream cheese, and imitation crab meat.
Stuff mushroom caps with the mixture. Drizzle your garlic butter over mushrooms.
Season with salt, pepper, and garlic powder.
Bake for 20 minutes or until mushrooms begin to soften. Serve immediately.


Enjoy! :-)


Monday, October 28, 2013

APPLE CRISP

APPLE CRISP
This recipe comes from my Aunt Sue!!! 
I decided to make apple crisp today because it seems like a nice time
in the season to go get some apples off our apple trees. They are
turning nice and sweet, so I thought I might as well do it!! :)


INGREDIENTS FOR THE CRUST
11/2 c. BUTTER (MELTED)
4 c. FLOUR
2 c. BROWN SUGAR
3 c. ROLLED OATS
1 TBSP. SALT

INGREDIENTS FOR THE TOPPINGS
ABOUT 15 PEELED APPLES
2 c. WATER
2 c. SUGAR
2 HEAPING TBSP. CORN STARCH
3 TSP. CINNAMON

(This does make two 9x13 pans.)

description

Preheat the oven to 375.
Get the 11/2 cups butter in a small bowl and put in microwave for 1 to 2 minutes.

description

I prefer to put a plate on top while in the microwave so the butter doesn't get all over.

description

Then mix the flour, brown sugar, rolled oats, salt, and butter in a large bowl.

description

Peel the apples. (If you prefer more, go right ahead and do it, the more the better.)
Put the crust on the bottom of "two" 9x13 pans (only use half of the mixture for the two pans you'll need the other half to sprinkle on top), then spread the apples all over and sprinkle a cup of sugar on top of the apples.

description

Get the water, sugar, corn starch, and cinnamon in a pan.
Bring it to a boil.

description

 After you bring it to a boil, pour it over the apples.

description

And here is why I said only use half of the mixture, now you cover the top of each pan.

description

Throw in the oven for 30 to 40 minutes.

description

 ENJOY!!!


Saturday, October 26, 2013

Caramel Brownie Bars

Are you craving a yummy, chocolatey caramel bar? I had found this on Facebook and I thought, "YUM!!! I need to make this!" So here it is!

Ingredients 
  • 1 box of Betty Crocker brownie mix
  • 2 eggs
  • 1/4 c. water
  • 2/3 c. vegetable oil
  • 3 cups of pretzels
  • 1 jar of caramel sauce (or in my case, 2 bags of Werther's chewy caramels) ;)
  • sea salt

Step 1.
Preheat the oven to 350 degrees. Take a 9x13 pan and line it with parchment paper.


Step 2.
Prepare the box of brownie mix according to the box.
 

Step 3.
Pour 1/3 of the batter onto the parchment paper and spread evenly. Lay down the pretzels evenly over the brownie mix.  Spoon the remaining brownie mix over the pretzels completely and let it seep into every crack. After the oven is preheated to 350 degrees put the bars in the oven for 30 minutes.


Step 4.
After the 30 minutes of baking are up, you can poke a toothpick in and if it comes out clean it is done. :)


Step 5.                                                                                                                                                       
The directions I found on Facebook said to use a jar of caramel, but sadly I could not find any at the local gas station so I grabbed 2 bags of Werther's chewy caramels. I unwrapped the caramels, placed them in a bowl and melted them in the microwave until they were a creamy caramel sauce. Though, I would definitely suggest using caramel sauce. ;)


Step 6.
After you pour the caramel sauce onto the bars and they are cooled, pinch some sea salt onto the bars and voilĂ ! YUMMY, YUMMY CARAMEL BROWNIE BARS!! :)


Wednesday, October 23, 2013

Chocolate Charge Bars

Chocolate Charge Bars!
 Okay, this recipe is for those of you who want to
satisfy your chocolate craving!

This was a simple and fun bar to make. This is not a recipe I would make for an ordinary occasion. To me, this is something a bit more special....so, I tried it when my entire family was home! 

All you will need are your favorite prepared chocolate chip cookie and
fudge brownie (I added chocolate chips to my brownies) recipes along with a package of Oreos.   (We used both the original and the mint stuffed cookies....whichever you prefer). 
Both were awesome!

Pat your cookie dough (approx. 1/2 inch thick) on the bottom of a 9 x 13 inch pan.  Arrange 20 Oreo cookies on top of the cookie dough. 

 Pour your brownie batter on top of the Oreo Cookies. 
  Bake in a preheated 350 degree oven for about 40 minutes or until done.

 When warm these bars taste like one rich brownie! They are an excellent choice to serve with a scoop of vanilla ice cream! 

When left to cool you can taste and enjoy the distinct layers. 

  
This is definitely a real treat for your next gathering or when you are truly craving chocolate and need a charge! 

Enjoy!


Monday, October 21, 2013

Halloween Treats!

Seeing Tricia's post for Mummy Suckers (click here for that!) reminded me of our little Halloween party last year at my parent's house. After going out trick or treating, we brought the younger kids back home to a brownie decorating competition and a spread of "Halloween themed" treats. Of course, after everyone had their snacks, we all piled in the living room to watch Tim Burton's "The Nightmare before Christmas". I had taken a picture of our treats last year for fun, but realized it came in handy for a post today. And just in time for you to plan the treats you'll be serving on that candy-filled night! :)


1. "Pumpkin Poop" 
Fill sandwich bags with cheese puffs. Decorate some cardstock paper and write a little poem. "I started to carve a pumpkin with my carving knife and scoop, but the pumpkin got so scared that he took a little poop!" Fold the paper over the sealed bag and staple in place.

2. "10 Finger Punch"
Fill two (2) clean, latex-free gloves with water or cranberry juice. Twist closed and tie tightly with a twist tie or rubberband. Place flat in the freezer and let rest until fully frozen. After preparing your punch, 
remove the "hands" and carefully peel or cut the glove off. Place in your punch bowl. :)

3. "Pumpkin Soda"
This one is very easy, but is super cute. Just get a 2-liter bottle of your favorite orange soda, peel off the label, and draw a jack-o-lantern face with a black Sharpie marker!

4.  "Candy Corn Parfaits"
To help make this night a little bit healthier, we made some parfaits layered with pineapple on the bottom, then peaches, and topped with whipped cream. (You could switch it up and use bananas or lemon pudding, and mandarin oranges, too. Whatever you like!)

5.  "Haunted House Brownie Competition"
This was one that the kids really had fun with. We made brownies using a haunted house mold and let them cool completely while we went out. When we got home from trick or treating, the kids were able to use all sorts of frosting, candies, and sprinkles to create their masterpieces. We did boys vs. girls and they had fun with it! The girls really tried to make theirs look nice, but the boys thought the more frosting and candy they could load on top, the better! :)


Happy Halloween! :)


Butternut Squash Hash

This time of year is always the best to incorporate those bold, rustic flavors into your meals. Flavorful stews, spicy sausage pasta dishes, and, of course, the rich taste of roasted squash. I was a little unsure of this dish when I first saw it on the Urban Poser blog, but once I made it, we knew it was a keeper! We've made it quite a few times now, and we will definitely be making it many more. Tony doesn't even like squash, but he loves this stuff!


Recipe adapted from The Urban Poser

Ingredients

1 medium butternut squash, peeled and cubed
2 large, crisp apples, cored and diced
1 large red onion, diced
7 slices uncooked bacon, diced
2 Tbsp. scallions, finely chopped
salt & pepper, to taste

Directions

Preheat the oven to broil.
After prepping the ingredients, heat a large skillet over a medium heat.
While the skillet is heating up, spread the diced butternut squash out evenly onto a cookie sheet lined with parchment paper.
 Place under the broiler and let it cook until it starts to get brown spots and develops a "skin" (stirring halfway through). This takes about 10-15 minutes. Watch it closely so that it doesn't burn too much. 
While the butternut squash is baking, add the bacon to the preheated skillet. 
Cook till crispy, then scoop onto a plate lined with paper towels to drain. 
Using the same skillet, keep about 2 tablespoons of the bacon fat on the bottom and add onion.
Cook just until onion starts to soften.

Add all the roasted butternut squash and the apples to the skillet, and season with salt & pepper.

Gently stir once, then let it cook until apples begin to soften. (You may need to scrape the bottom a couple times, but don't over stir otherwise it will get mushy!)
Add the bacon pieces and scallions before serving.

*This is a great dish to serve with fried eggs. :)


(Directions with Photos)

Preheat the oven to broil.
After prepping the ingredients, heat a large skillet over a medium heat.


While the skillet is heating up, spread the diced butternut squash out evenly onto a cookie sheet lined with parchment paper.
Place under the broiler and let it cook until it starts to get brown spots and develops a "skin" (stirring halfway through). This takes about 10-15 minutes. Watch it closely so that it doesn't burn too much.


While the butternut squash is baking, add the bacon to the preheated skillet. 
(I don't have a big, cast-iron skillet, so I just used a pot that we have.)


Cook till crispy, then scoop onto a plate lined with paper towels to drain. 


Using the same skillet, keep about 2 tablespoons of the bacon fat on the bottom and add the onion.


Cook just until onion begins to soften.


Once the squash is done, and the onions are softened, you're ready to start putting it all together! :)


Add all the roasted butternut squash and the apples to the skillet, and season with salt & pepper.


Gently stir once, then let it cook until the apples begin to soften. 
(You may need to scrape the bottom a couple times, but don't over-stir otherwise it will get mushy!)


Add the bacon pieces and scallions before serving.


(*If you divide this recipe to serve 6, each serving is 6 points on Weight Watchers.)


Sunday, October 20, 2013

Buffalo Chicken Bites

If you haven't noticed already, my husband and I are big fans of buffalo chicken dishes. And we're not the only ones in the family known to eat it up! My Mom makes an amazing Buffalo Chicken Stromboli that is to die for! Using that idea as a base, Tony and I decided to make some bite-size pieces to eat for dinner and freeze the rest for later. 


Ingredients

1 1/2-2 cooked chicken breasts, cubed or shredded
1/2 c. buffalo sauce
1 pizza crust, unbaked (store-bought or homemade)
1/4 c. ranch dressing
1/4 c. buffalo sauce
2 c. mozzarella (or pepper jack) cheese, shredded
Olive oil spray
garlic powder

Directions

In a large skillet, heat the cooked chicken and the 1/2 cup buffalo sauce until simmering. 
Let it simmer and stir occasionally until the chicken soaks up most of the sauce.
Remove from heat and set aside to cool.
While the chicken is cooling, roll your dough out onto a floured surface. 
Shape in into a long, fairly narrow rectangle.
In a small bowl, stir together the ranch dressing and the remaining 1/4 cup buffalo sauce.
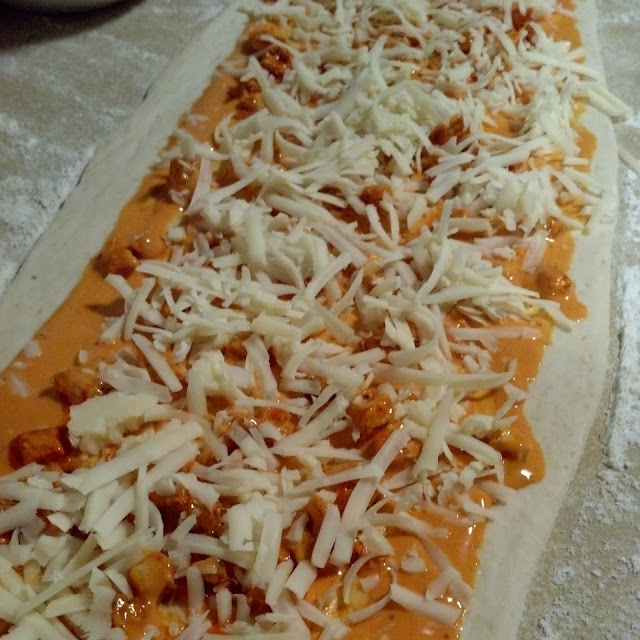
Spread mixture evenly onto the dough, leaving about 1-1 1/2 inches around the edges.
Sprinkle cooled chicken on top.
Sprinkle cheese over the chicken.
Tightly tuck edges in and roll lengthwise to create a small, long tube. 
Tuck ends underneath.
Using a sharp knife, cut into 1 inch slices.
Place rounds on a cookie sheet lined with parchment paper.
Lightly spray with oil and sprinkle with garlic powder.
Bake at 350 degrees for about 20 minutes, or until golden brown.


**If you want to freeze these bites, you can place them on the cookie sheet and put them directly in the freezer instead of the oven. Once firm and frozen, remove from cookie sheet and transfer to a large freezer bag. When ready to serve, remove from freezer, place on cookie sheet. Let thaw up to 12 hours in the refrigerator. Bake at 350 degrees until golden brown.


(Directions with Photos)


In a large skillet, heat the cooked chicken and the 1/2 cup buffalo sauce until simmering. 


Let it simmer and stir occasionally until the chicken soaks up most of the sauce.
Remove from heat and set aside to cool.


While the chicken is cooling, roll your dough out onto a floured surface. 
Shape into a long, fairly narrow rectangle.


In a small bowl, stir together the ranch dressing and the remaining 1/4 cup buffalo sauce.


Spread mixture evenly onto the dough, leaving about 1-1 1/2 inches around the edges.


Sprinkle cooled chicken on top.


Sprinkle cheese over the chicken.


Tightly tuck edges in and roll lengthwise to create a small, long tube. 


Tuck ends underneath.


Using a sharp knife, cut into 1 inch slices.


Place rounds on a cookie sheet lined with parchment paper.


Lightly spray with oil and sprinkle with garlic powder.
Bake at 350 degrees for about 20 minutes, or until golden brown.


Eat plain, or serve with a side of buffalo sauce, ranch dressing, and/or Bleu cheese dressing!


Check these out!