Search This Blog

Showing posts with label Breads & Muffins. Show all posts

Tuesday, February 16, 2016

Quick Sub Sandwich Buns

When I came on to post today, I found this gem in my drafts.  I thought I posted it last summer, but apparently, I never got around to it.  Since we are in the middle of winter, maybe a glimpse of the greenery in the background will get your spirits up!  The world will be green again soon! ;)


Ingredients

1 c. warm water
1 Tbsp. yeast
1 Tbsp. sugar
2 Tbsp. olive oil
1 tsp. salt
2 1/2 c. flour


Directions

Preheat oven to 350 degrees.
In a mixing bowl, combine water, yeast, sugar, and oil.
Mix well then let rest 10 minutes.  (Mixture should get foamy/bubbly.)
Stir in half of the flour, then add the salt.
Stir in remaining flour until soft dough forms.
Knead until dough becomes smooth and elastic, about 6-8 minutes.
Turn over in a well-oiled bowl, cover, and let rise 30-40 minutes.
Shape into desired size rolls and place on cookie sheet lined with parchment paper.
Let rise at least 15 minutes.
Bake for 15-20 minutes, or until buns are golden brown.
(Baking time will vary depending on the size of the buns you are making.)


{These buns reminded me a little of the Jimmy John's sub buns.  They are soft, yet dense, in the center with a chewy (but not crispy) crust.}


Monday, February 8, 2016

Banana Muffins

Hello Everyone! Who all loves banana bread? Well, if you do, you will love this recipe. Instead of banana bread, we are going to make banana muffins! We made them mini bite size, but you can do what you like. 


INGREDIENTS

3 c. flour
2 tsp. baking powder
2 tsp.baking soda
1 tsp. salt
6 large ripe bananas (mashed)
1 1/2 c. white sugar
2 eggs
2/3 c. butter (melted)

Coat muffin pans with non-stick spray, or use paper liners.
Preheat oven to 350 degrees.

1. In a small bowl mix together the flour, baking powder, baking soda, and salt: set aside. 


2. In a different bowl, mix together bananas, sugar, egg, and butter in a large bowl.


3. Combine the flour mixture with the liquid mixture.


4. Bake large muffins for 25 to 30 minutes.
Bake mini muffins for 10 to 15 minutes.


Enjoy your freshly baked muffins!


Saturday, September 5, 2015

Healthy Zucchini Muffins

Once of the best things about the end of summer is collecting all of the wonderful fruits and vegetables fresh from the garden and orchard.  The hubs and I live in an apartment so we don't have our own garden, but we have been lucky enough to get fresh produce from my parents and grandparents.  They have been stocking us up with raspberries, cherries, green beans, peas, zucchini, summer squash, cucumbers, and sweet corn!

We had a large zucchini sitting on the counter so, while Tony was out golfing, I decided to do some baking with it.  I absolutely love zucchini bread, but I didn't want to load it with oil or butter like most recipes call for.  I tweaked a few recipes that I found to make this healthier version of the beloved zucchini bread.  The pictures really don't do them justice!  They are so flavorful and moist!

Don't be afraid to make substitutions if you don't have certain ingredients.  You could replace the chia egg with a regular egg, the almond milk with cows milk, whole wheat pastry flour with all-purpose flour, etc.  They are great served warm with a little butter or cooled.


Ingredients

Dry Ingredients:
1 2/3 c. whole wheat pastry flour
1 tsp. baking powder
1 tsp. baking soda
1 1/2 tsp. cinnamon
1/2 tsp. salt
1/3 c. oats 

Wet Ingredients:
1/2 c. maple syrup
1/2 c. almond milk
1/4 c. applesauce
1 chia egg*
1 tsp. vanilla
2 c. loosely packed, grated zucchini


Directions

Preheat oven to 350 degrees.
Combine dry ingredients in a mixing bowl, and wet ingredients in another.
Pour dry ingredients into the zucchini mixture and stir just until combined.
Scoop into lined or greased muffin tins.
Sprinkle a little oats on top for fun, if you'd like.
Bake for about 20 minutes, or until toothpick inserted in center comes out clean.

*To make a chia egg: Mix 1 tablespoon of chia seeds with 3 tablespoons of water, then let rest to "gel up" for about 15 minutes before using.


Monday, July 27, 2015

Apple-Cinnamon Muffins

When you go grocery shopping, do you ever stock up on tons of fruits, then realize later in the week that there is absolutely no way you are going to be able to eat it all before it starts rotting?  Unless I'm careful about what I'm purchasing, this happens nearly every week.  Before I go to the store, I make a menu, write down my grocery list needed for the meals, then I generally put "fruit" at the bottom of the list so I can pick and choose once I'm there, depending on prices.  

However, once I get there, I see sale prices.  It all looks so juicy and delicious that, before I know it, I have enough fruit to not only feed my husband and me, but probably all of my 10 siblings, too!  I know you're probably thinking "Just put some back!", but I don't usually realize it's way too much until I'm at home putting everything away.  Fruit is sneaky like that.

Don't worry, I really try not to let it go to waste.  Our freezer is packed with cleaned, chopped fruit: very handy when throwing together a smoothie or some blueberry muffins!  Apples, however, are trickier for me.  If any type of fruit gets wasted in our home, it's generally the apples.

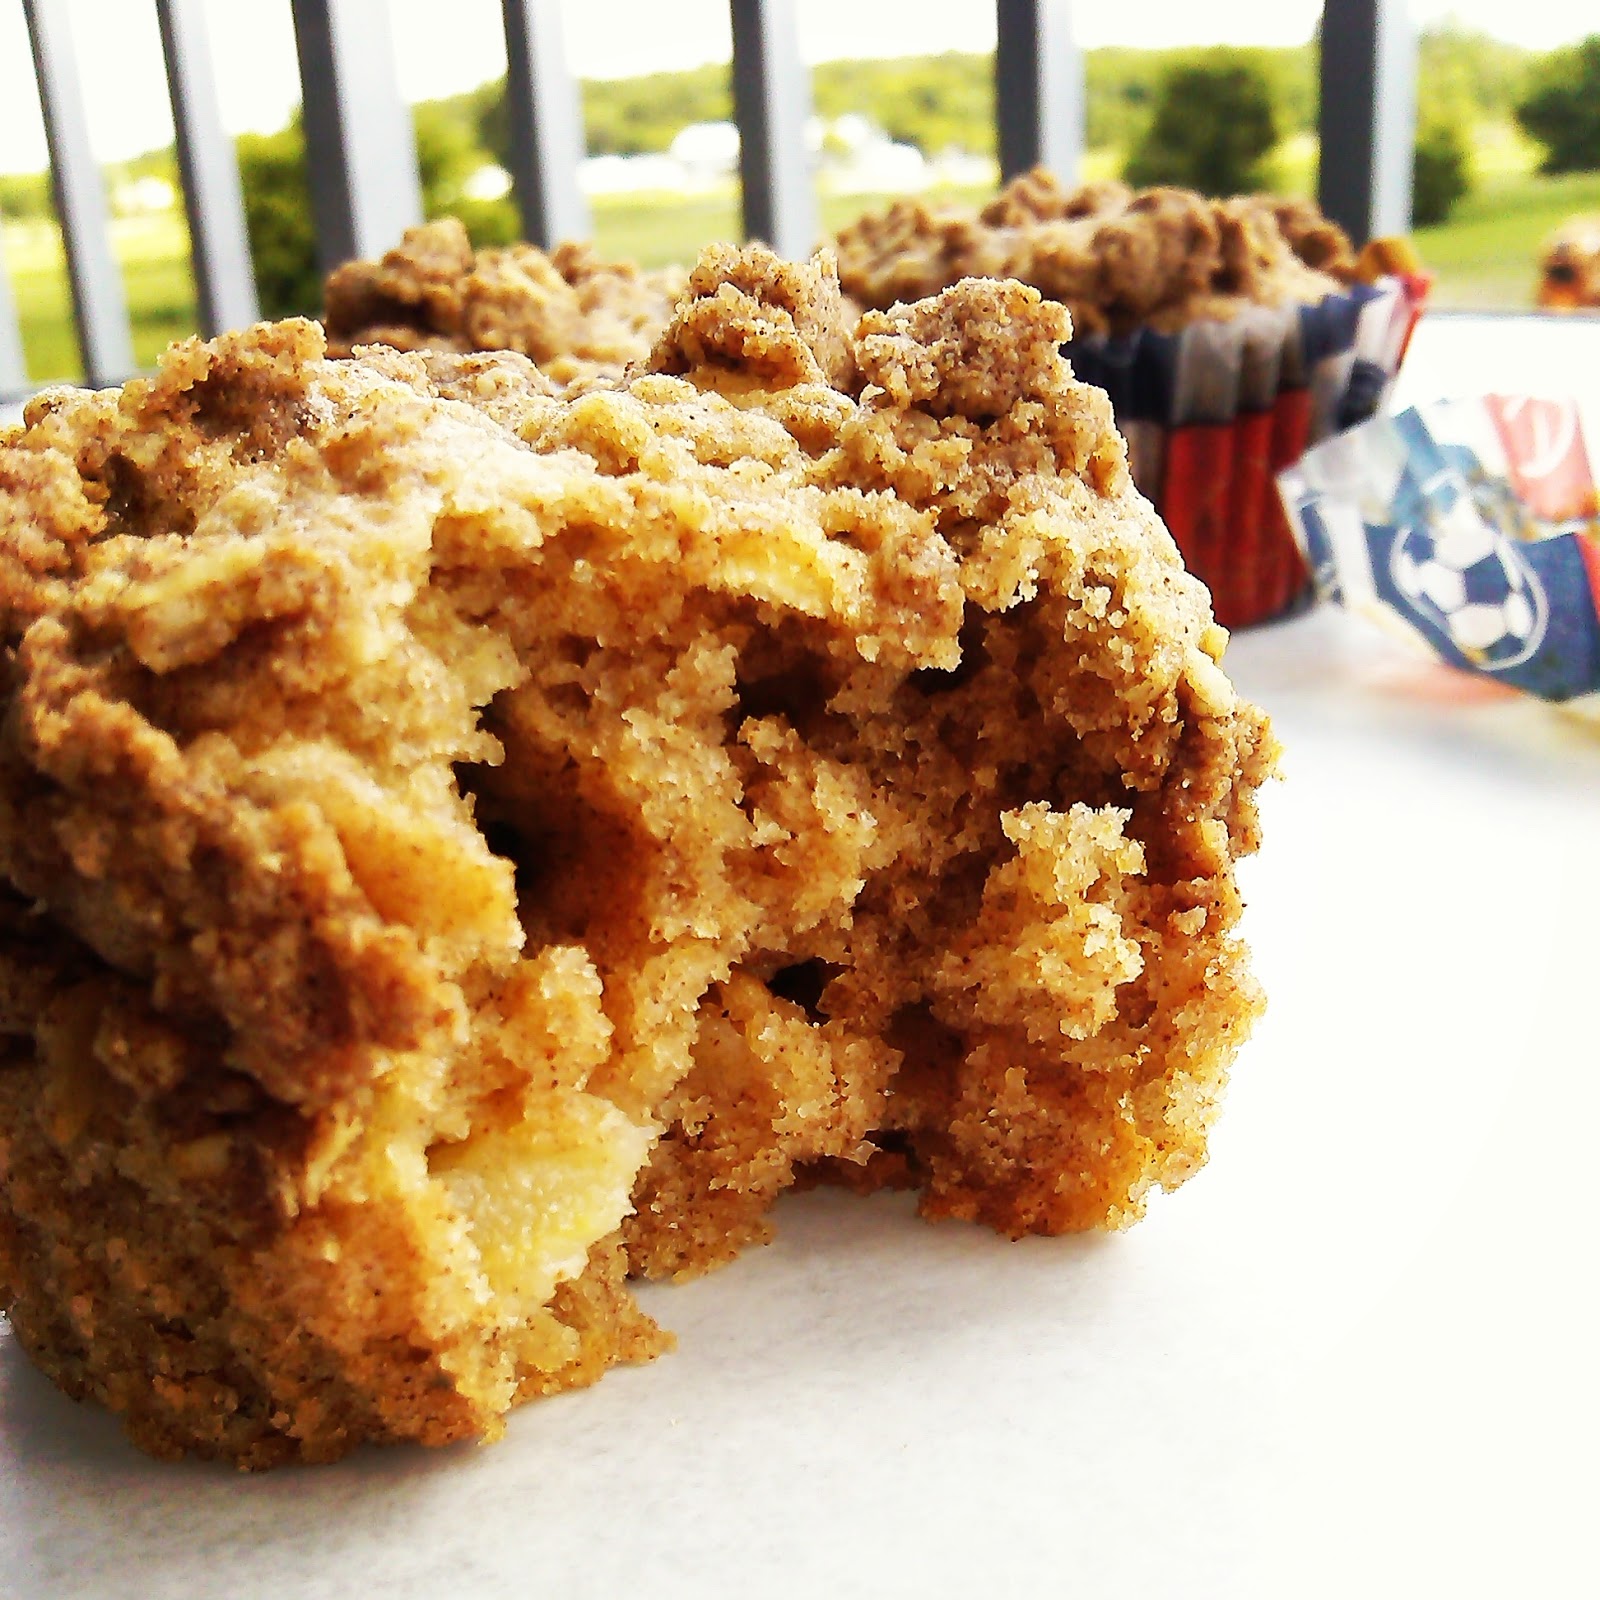
These babies were created so I didn't have to feel the guilt in my chest as I chucked a half dozen braeburns.  If you're not looking for a way to use up your fruit like I was, go buy some apples just for this recipe.  You won't regret it.  They are pretty tasty.


Don't worry too much about the type of apples you use, any kind will do!
(I think I had a mixture of braeburn and gala.)  


Apple-Cinnamon Muffins
Makes about 32-36 muffins.

Ingredients

APPLES:
4 c. apples, peeled, cored, and diced small
4 tsp. flour
1 tsp. cinnamon

BATTER:
2 c. all-purpose flour
2 c. whole wheat pastry flour
3 tsp. baking powder
1 tsp. salt
4 tsp. cinnamon
1/2 c. butter, softened
1/2 c. coconut oil
2 c. cane sugar
2 eggs
2 chia eggs*
4 tsp. vanilla extract
1 c. unsweetened almond milk

CRUMB TOPPING:
butter, melted
flour
sugar
cinnamon
oatmeal


Directions

Preheat oven to 350 degrees.
For the apples, combine the flour and cinnamon and toss with the apples. Set aside.
In a medium bowl, combine the flours, baking powder, salt, and cinnamon. Set this aside, too.
In a large bowl, beat the sugar with the butter and coconut oil until creamy.
Add the eggs, one at a time.
Beat in the chia eggs and vanilla.
Begin adding the flour mixture and the almond milk, alternating between the two, just until combined.
Fill lined muffin tins about 3/4 full with the batter. (I filled 24 muffin liners, then poured the remaining batter in a greased loaf pan.)
Now, it's time to mix the crumb topping.  I melted 1/2 cup of butter in a small bowl, then mixed in a couple teaspoons cinnamon, about 1/4 cup sugar, about 1/2 cup flour, and about a 1/2 cup oatmeal.  If it's still too wet, add more flour or oatmeal until it resembles a coarse crumble topping.
Sprinkle over the muffins and bake for about 30 minutes, or until toothpick inserted in center comes out clean.
Remove from pans and let rest on a cooling rack.
Enjoy!


*For each chia egg you want to mix 1 tablespoon chia seeds with 3 tablespoons water and set aside for 5-10 minutes or until gelled. (So for this recipe, you will be using 2 Tbsp. chia seeds & 6 Tbsp. water.)


A warm, apple-cinnamon muffin fresh out of the oven and a hot cup of coffee in the morning sounds like a pretty perfect breakfast to me. :)


Thursday, May 28, 2015

Multi-Grain Bread

Okay, so I'm pretty sure I told you guys that my absolute favorite homemade bread was a toss up between my Mom's homemade bread and the Honey Oat Bread that I posted awhile back.  I'm here to tell you that I found another recipe that is going to give them a run for their money!  While I still love both of those, this new recipe for a multi-grain loaf is absolutely incredible. 

I really wanted to find a recipe that used more grains and felt a bit "healthier" for us.  I searched all around town for a whole grain loaf of bread that had a lot of texture and nutty-ness. I found a local bakery that had a high fiber, nutty loaf that matched the texture I was looking for....but it was almost $7 a loaf! I'm willing to pay that once in awhile to get a good loaf of bread, but we can't afford to buy that to use as our normal supply.

I searched the web to find a bread that would satisfy my cravings and came upon a recipe for multigrain bread that was posted by Sara at Our Best Bites.  She used a 7-grain mix, but my grocer didn't have it stocked.  I chose an 8-grain instead and I have already used a 10-grain mix, as well. (Because obviously I've already made like 6 loaves of these bad boys!) Both turned out great!  However, I think I preferred the 8-grain over the 10-grain for the simple fact that it seemed "nuttier". 

 I know it seems like more grains would give you nuttier bread, but that's not necessarily the case.  The more grains they put in the mix, the more fillers get added, like oats, corn grits, and soybeans. Both mixes I used contained flaxseed (which I wanted), but the 8-grain had sunflower seeds too, whereas the 10-grain didn't.  Basically, what I'm trying to say is that the 7, 8, and 10-grain mixes all work to make wonderful bread, just be sure to check the bags to see what types of grains you prefer.

Just as an example on how yummy this bread is...a few of my siblings came and stayed with us for a weekend about 3 weeks ago.  I made 4 loaves of this bread the night before they arrived.  (I made 2 regular and 2 with cinnamon raisin. Yum! But I'll get to that in a bit...)  When they left on Sunday, we only had 1 loaf left! My thirteen year old brother, Paul, went especially nuts for it.  He really liked it smeared with my Raspberry Chia Jam!

The following week, I made another batch and froze the loaves.  When I knew my Mom was bringing Paul down to swim in the pool at our apartment, I pulled out a loaf to have thawed and ready.  That evening he ate half of it by himself!  Last night he was here again and asked me quietly if I had "that bread" again.  Looks like I may need to make another batch soon! :)

**I know the directions may look pretty intense at a glance, but it really is a simple bread to make!
I just tried breaking it down into steps that were easy to follow.  You can do it! :)


Multi-Grain Bread
Adapted from Our Best Bites


Ingredients

1 1/4 cup 8-grain hot cereal mix, dry (I used Bob's Red Mill brand)
2 1/2 cups boiling water
3 cups all-purpose flour
1 1/2 cups whole wheat flour
1/4 cup honey
4 tablespoons butter
2 1/2 teaspoons active dry yeast
2 1/2 teaspoon salt
1/2 cup old fashioned oats, for rolling


Directions

1. Measure out 1 1/4 cups of the dry cereal mix into a medium bowl.  Set aside.
Bring the 2 1/2 cups of water to a boil, then pour over the cereal mix. Stir until moistened.
Set aside to rest for 1 hour.

2. While that is resting, in a large bowl, combine the all-purpose flour and the whole wheat flour.
In a small bowl, melt the butter completely, then allow to rest and cool until needed.

3. Once the hour wait is over, pour the honey, butter, and yeast into the mushy cereal mix and stir until well combined.

4. Add the mush mixture to the large bowl of flour and stir 3 or 4 times.

5. Add the salt.

6. Continue stirring, creating a lumpy mass of floury dough.
Pour onto a clean counter and begin kneading. (It will seem way too dry at first, but keep kneading!)
It will begin to take the form of dough and may become sticky, but do your best not to add more flour. (You can if you absolutely need to, but only a light dusting at a time.)

7. Knead for at least 5 minutes!

8. Transfer dough to a well oiled boil, cover, and let rise for 1 hour.

9. Punch raised dough down and divide into two equal portions.

10. Using your fingers, press one portion into a rectangle (about 1/2 inch thick).
Starting at a narrow end, begin tightly rolling the dough into a log.

11. Turn the seam to the bottom, then pinch the ends and tuck them under. 
Lightly spray the loaf with oil.

12. Sprinkle the oats on the counter and roll the loaf in the oats.

13. Place in a greased loaf pan.

***Repeat steps 10-13 with the remaining portion of dough.***

14. Adjust the oven racks to the middle position, preheat the oven to 375 degrees, then cover the loaves with greased plastic wrap and allow to rise 30-45 minutes.

15. Place in the oven and bake until golden brown and thermometer reads 200 degrees (mine took about 40 minutes).

16. Transfer pans to a cooling rack and let rest 5 minutes.

17. Gently remove bread from the loaf pans, return them to the cooling rack, and let rest about 2 hours before slicing. (If you can wait that long!)
Be sure the loaves are completely cool before wrapping to store.

(I have wrapped them in 2-3 layers of plastic wrap, then a layer of heavy-duty aluminum foil to freeze them. Then, when I'm ready for one, I take it out of the freezer, and place it (still wrapped) in the fridge or on the counter to thaw overnight. Works great!)


**********************************************

This gives you an idea of what the 8-grain hot cereal mix looks like.


After mixing it with the boiling water and letting it rest for an hour, it should look something like this:


Some people don't test the temperature of their bread, and you may not like to.  You certainly don't have to.  I do like to check mine though.  It makes it much less stressful.  You don't have to worry about cutting into a golden brown loaf of bread, only to have it heavy and gooey inside. If a thermometer reads at 200 degrees, you know it's done!


Doesn't that just look delicious!!?
I wish I had something other than the camera on my phone, so I could do it a little more justice! :)


Now, I told you before that I have made some as cinnamon-raisin loaves.  It makes wonderful cinnamon-raisin toast!  When you are at step 10 (pressing it into a rectangle), just melt some butter and spread it over the rectangle (just enough to coat it), then sprinkle it heavily with a mixture of ground cinnamon and cane (or granulated) sugar.  Next, sprinkle on the raisins!
When you begin to roll it into a log, be sure to keep it nice and tight, so it stays together after it's baked. :)


Sunday, February 1, 2015

Honey Oat Bread

I wouldn't consider myself an experienced bread baker, but I do think I have the potential to be a professional homemade bread taste-tester. I love homemade bread. Although I haven't been the one to always do the baking, I rarely pass up the opportunity to eat the deliciousness that is homemade bread.

Now, I'm not the type of person to load up on pre-sliced loaves from the grocery store. Yes, they are usually pretty tasty (especially when you get the loaves filled with nutty goodness!), but I don't crave it like I crave heartier loaves of bread. The thought of a fresh loaf of Mom's Homemade Bread coming out of the oven, or buttering up a crusty slice of Artisan Bread is like food heaven.

Which brings me to my post for today. This recipe for Honey Oat Bread is one of my new found favorites. I came across it a few months ago and haven't looked back. Not only does it smell divine while it is in the oven, it has the perfect amount of "bready-ness" with a slight sweetness that makes you want more than one slice. (Or maybe half of the loaf, but let's not talk about that...) Inside, it is soft and chewy while the crust has a coat of baked honey and oats that is absolutely irresistible.


I like to have everything set out so it's ready when I need it. This recipe is a bit different than the normal bread recipes where you dissolve the yeast before adding additional ingredients. It may seem strange and throw you out of your bread-making comfort zone, but give it a shot. At least once. You will be surprised at the outcome.

In a large bowl, combine the flour, oats, yeast and salt. (Yes, I know it's weird. Just go with it.)
In a separate bowl, warm the milk and butter.


Then add the water and honey to the milk.


Pour the milk and honey mixture into the flour mixture.


Stir until you have a rough dough.


Transfer dough to a clean, dry counter.


Knead the dough for 10 minutes.

When you first start out, the dough will be rather sticky. Just keep working it and you will see it transform into a smooth, elastic dough. It seems excessive, but kneading it for the full 10 minutes is very important for this bread. (You could use a Kitchen-Aid mixer with a dough hook instead if you have one.) I usually set a timer and get a rhythm going. Ten minutes gets to feeling like a long time, so it's best to make it a little more fun. Maybe crank up the music, too. :)


Turn the dough over in a large, well oiled bowl. 
Cover with plastic wrap and set in a warm place to rise until doubled.


While it's rising, line 2 loaf pans with parchment paper.


Divide the risen dough in half. Using your hands, press one half into a rectangle (about 9x12 inches).


Begin tightly rolling the dough into a log. Pinch and tuck the ends underneath.


Transfer to prepared loaf pan and repeat with the other half of the dough.


Cover and let rise 30 minutes.


Warm the honey in the microwave and scoop up some oats.


Set an empty loaf pan on the bottom rack of the oven. Turn the oven on to preheat to 350 degrees. On the stove top, bring about 2 cups of water to a boil.


Drizzle the warmed honey over the tops of the loaves.


Gently brush them to coat.


Sprinkle the oats over the honey.


Place the loaves in the oven and carefully pour the boiling water into the empty loaf pan that is on the bottom rack of the oven.
Quickly close the oven door and bake the loaves for about 40-50 minutes or until they are golden brown and the internal temperature is 190 degrees.
Remove from the pans and transfer to a cooling rack.
Once cooled, store in a large ziploc bag.


Ingredients

6 c. all-purpose flour
1 1/2 c. oats (I have used quick and old fashioned, both work great)
4 1/2 tsp. yeast (instant or active dry)
3 tsp. salt
2 c. milk (almond milk works, too)
1/2 c. lukewarm water
4 Tbsp. butter, softened
1/2 c. honey

For topping:
4 tablespoons honey, warmed
1/4 c. oats

Directions

In a large bowl combine the flour, oats, yeast, and salt. Set aside.
In a small bowl, warm the milk so that it’s hot enough to melt the butter, but not boiling. Add the butter, stirring until melted, then stir in the warm water and honey.

Pour the milk mixture into the flour mixture, mixing with a dough hook or wooden spoon, until it just comes together to form a rough dough. 

Knead the dough on a clean, dry surface for 10 minutes. Dough will be very sticky at first. Just be patient. :)
(If the dough is still very wet and sticky after 5 minutes of kneading, add a little more flour until the dough is barely tacky. If the dough is too dry, add just a bit of water to soften it up.)

Place the dough in an oiled bowl, cover, and allow to rise in a warm place until doubled, about 1 hour.


Line two loaf pans with parchment paper and set aside.

Once doubled, divide the dough in two. 
With your fingers, flatten the dough into a 9 by 12-inch rectangle. Tightly roll the dough into a log. Flatten each end and tuck underneath. Transfer to a prepared loaf pan and repeat with the other half of the dough. Cover the loaves and allow to rise again for 30 minutes.

Place an empty loaf pan on the bottom rack of the oven and preheat it to 350 degrees. 
Bring 2 cups of water to boil on the stovetop.

When the loaves are done rising again, brush the tops with the warmed honey and sprinkle the oats on top.


Place the bread on the middle rack in the oven and carefully pour the boiling water into the empty loaf pan on the bottom rack of the oven. Quickly close the oven door.


Bake for 40 to 50 minutes, until the bread is deep golden brown and the internal temperature is about 190 degrees. 
Transfer to a wire cooling rack and allow to cool completely before serving.


*If you don't need both loaves right away, I have been known to freeze this bread. It works wonderfully!
I wrapped the completely cooled loaf with 3 layers of plastic wrap, then a layer of heavy-duty aluminum foil. When you need to take it out of the freezer, just set it on the counter and let it thaw overnight.


Friday, January 30, 2015

Homemade Chicken Pot Pie

Pie crust

1 1/4 cups all-purpose flour

1/4 teaspoon salt

10 tablespoons unsalted butter cut into cubes

2 to 4 tablespoons ice water, as needed


Ingredients

1/3 cup butter

1/3 cup all-purpose flour

1/2 teaspoon salt

1/4 teaspoon ground black pepper 

1 3/4 cups chicken broth

2 cups chopped cooked chicken

1 can peas

1 can corn

1 can beans

 pie crust

2 tbsp of milk

Preheat oven to 425 degrees.


First, if you are planning on making your own crust you will want to do that right away. With the recipe above I had mixed the flour and salt together. After that I mixed it the butter by using a fork to cut the butter into the flour mixture, then added the water. Roll out crust, and lay into greased or nonstick pan. Also roll out enough dough to lay on the top of the pan. Set aside.


Cook chicken in a small skillet.

While you are waiting for the chicken to finish, melt butter in a large pan. Once it has melted add flour, salt, and pepper and mix for a few minutes on medium heat.


 I didn't have any chicken broth on had but I did have some bullion cubes so I boiled 2 cups of water and added  3 bullion cubes (ratio is 1 to 1 cup, but I wanted a little more flavor.) And there you have it...chicken broth!

Remove broth from heat and pour into your pan of butter, flour, salt and pepper mix; bring to a boil and cook until it is slightly thickened.

Next, add the beans, corn, peas and chicken into the mix.


Mix well and pour evenly over the pan of crust.


Lay your remaining pie crust you set aside earlier over the top and press edges together with the crust on the sides. Poke crust with a fork and spread milk on crust.


Cook in oven for about half an hour or until golden brown on top.


Cut yourself a piece and enjoy! 


Check these out!