Search This Blog

Monday, June 16, 2014

Monster Cookies

When you ask someone what their favorite kind of cookie is, the majority of the time they are going to tell you "chocolate chip". It just happens that way. Chocolate chip cookies are a classic, can-never-go-wrong kind of cookie to serve. However...this one has become one of my husband's favorites, and mine, too! 
Monster Cookies. 
They are chewy inside, yet crisp on the outside, contain NO FLOUR, and are filled with all sorts of yumminess. :)


Ingredients

3 eggs
1 1/4 c. brown sugar, packed
1 c. sugar
1/2 tsp. salt
1/2 tsp. vanilla
1 1/2 c. creamy peanut butter
1/2 c. butter, softened
2 tsp. baking soda
4 1/2 c. rolled oats
1 c. peanut M&Ms
1/2 c. chocolate chips
1/3 c. raisins
1/2 c. shredded coconut, toasted & cooled


Directions

Preheat oven to 400 degrees.
Spread coconut on large baking sheet and bake until lightly golden. Remove from oven and set aside to cool.
Turn oven down to 350 degrees.
In a large bowl, beat eggs and sugars until blended.
Add salt, vanilla, peanut butter, and butter.
Stir until well combined.
Sprinkle baking soda over mixture, then add oats. Stir well.
Mix in M&Ms, chocolate chips, raisins, and cooled coconut.
Scoop dough on an ungreased baking sheet (lined with parchment, if possible) about 2 inches apart.
Gently press about 1/2 way down.
Bake 12-18 minutes, depending on size, or until golden on the edges. (May look slightly shiny at the centers yet...that's okay!)
Let cool on baking sheet for about 3 minutes before transferring to a cooling rack to cool completely.


*************************************************************************\

(Directions with Photos)
*I apologize for my pictures, my phone camera was not cooperating well with the lighting. :/


Preheat oven to 400 degrees.
Spread coconut on large baking sheet and bake until lightly golden. Remove from oven and set aside to cool.
Turn oven down to 350 degrees.
In a large bowl, beat eggs and sugars until blended.


Add salt, vanilla, peanut butter, and butter.
Stir until well combined.


Sprinkle baking soda over mixture, then add oats. Stir well.


Mix in M&Ms, chocolate chips, raisins, and cooled coconut.


Scoop dough on an ungreased baking sheet (lined with parchment, if possible) about 2 inches apart.


Gently press about 1/2 way down.


Bake 12-18 minutes, depending on size, or until golden on the edges. (May look slightly shiny at the centers yet...that's okay!)
Let cool on baking sheet for about 3 minutes before transferring to a cooling rack to cool completely.
(Once cooled, store in an airtight container.)


Saturday, June 14, 2014

Painted Burlap Quote {A Father's Day Project}


Father's Day!

I love Father's Day.  I am very sad that I am 1000 miles from my wonderful daddy on this special day, but  thankful he knows I love him sooooo much!  I think I will have to Skype with him for a little while on Sunday though. ;)

Although my daddy is far away, I am lucky to have my "Papa Joe" close.  He's my other daddy (Mike's Father).

Rather than getting a tool to add to his collection, Mikey and I decided to take some time and MAKE a gift.  I can sew...and crochet...but I have never been patient with piddly stuff.  That's all Nae Nae. ;)  Channeling my inner crafter, I decided this project looked easy enough that I could complete it and cute enough that it would make a nice gift.  Who knows, he's probably going to miss that tool! ;)

What made us decide to do this?  Having some pretty awesome conversation on the deck a couple years back, Papa Joe had nonchalantly said these words.  Loving it, I grabbed a sheet a paper, quickly jotted it down, and then put it in my cedar chest.  After, I returned to the deck to have more great conversation.

Recently, I was going through my cedar chest looking for wedding ideas for my sister.  Yippy for wedding!  Sorry... off topic.  Anyway, as I was going through my cedar chest and I found that sheet of paper.  Telling Mikey about it, we came up with this idea!

This project was about my limit for patience while doing a craft, but  it was well worth my time.  I would definitely recommend this to people that don't think they can do a D.I.Y. project.  I will be doing this again.  Pinterest has all sorts of great sayings. ;)

Items Needed:

Frame
burlap
Satin Acrylic paint
Spouncers
Stencil
"paint trays"
Paper towels
Paper
scissors
Gloves (optional, but I wouldn't have done it without them.  I am messy  though.)

  • Remove any matting or paper from frame
  • Clean glass so it will be ready when you put your project in.
  • Cut burlap. Leave quit a bit extra.  You can always remove the excess.
  • Get "paint trays".  I just wrapped aluminum foil around small kitchen plates.  It worked.
  • Taking a bunch of paper, I cut squares.  Then I cut circles which were large enough that it would accommodate the stencil, but small enough that you wouldn't paint any part of the other letters.  I will show you in a picture what I mean.
  • Wearing gloves, start stenciling.  I used a little amount of paint, adding thin layers as needed.  If you have too much paint on your spouncer, it seeps under the stencil.
  • Between every application, I set my stencil on some laid out paper towel and carefully dabbed off the excess.  I didn't want to leave paint blotches all over.  That's up to you though.  I was looking for a cleaner look. 
Below are a few of the products I used...

I just bought the burlap at Walmart.  Everything else, I found at Michaels!


Wednesday, June 11, 2014

Strawberry Chimichangas

First of all, the term "chimichangas" in this recipe may be a little deceiving.  I should call it a chimichanga makeover. :)
I don't own a deep fryer. An easy fix (and perhaps a little healthier) is to pull out the largest skillet you have and melt some butter to fry up your "Chimichangas". I love butter! And you still up with some delicious chimichangas without the extra grease! (You're welcome.)


Look at all that deliciousness. 
And it is so easy!!

All you need:

8 oz cream cheese (softened)
1 cup strawberries (sliced and diced)
1 1/2 Tablespoons sugar
6 flour tortillas (8 inch) 
3 Tablespoons butter
Cinnamon sugar (made with 1/4 cup sugar and 1/2 - 1 Tablespoon ground cinnamon)


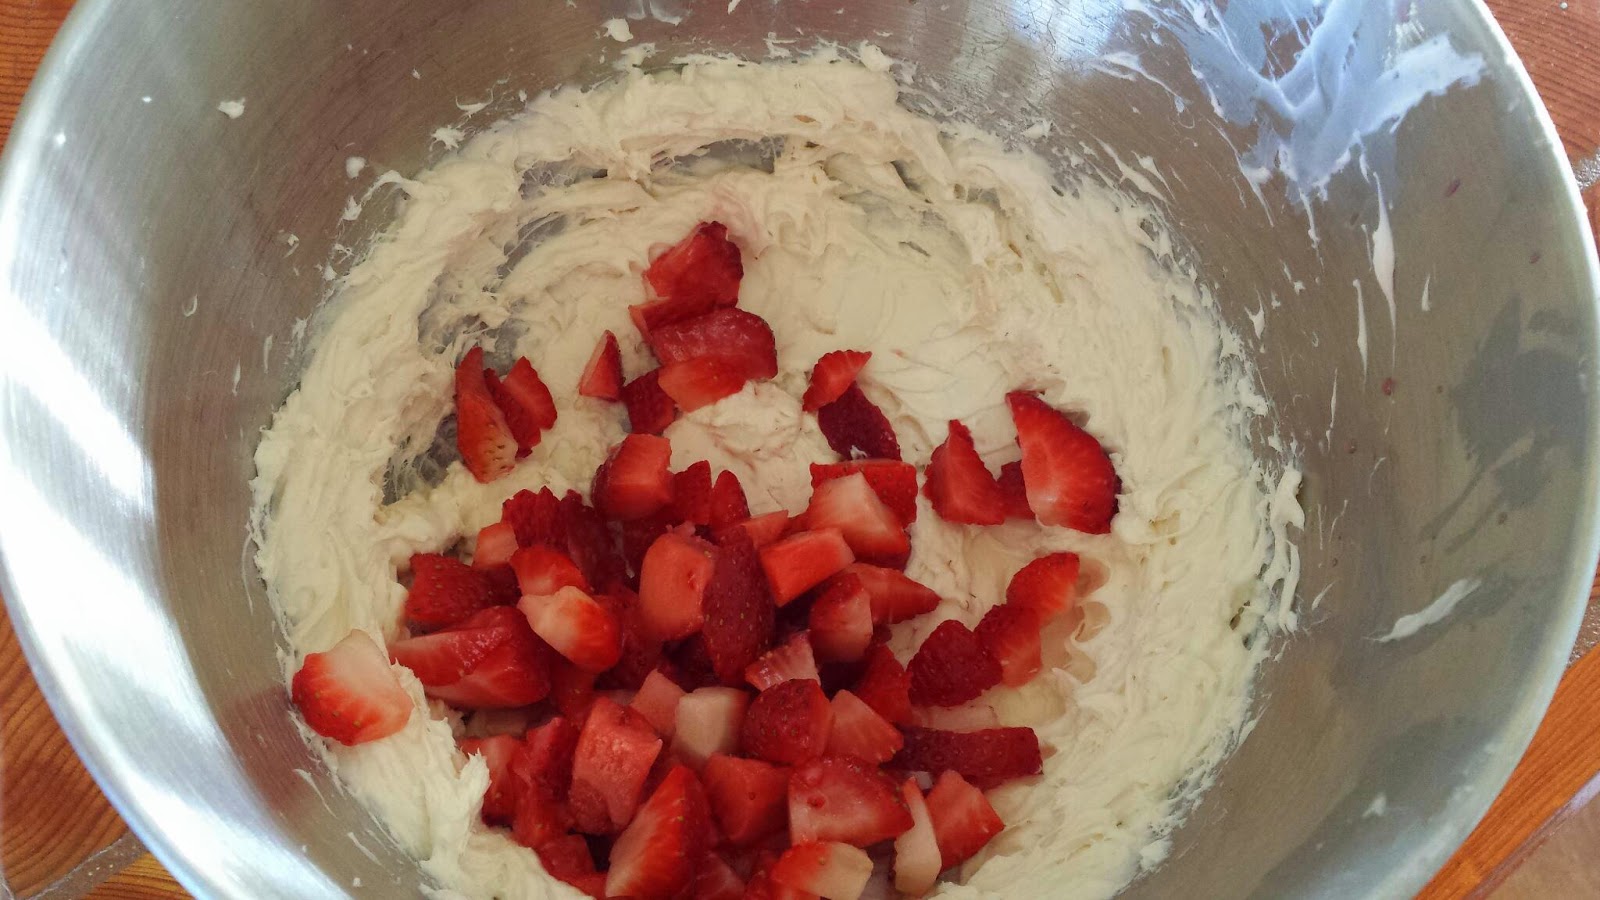
First you need to mix the cream cheese and 1 1/2 T. sugar with a mixer. When it is mixed well, gently fold in the strawberries.

Next you need to mix up your cinnamon sugar. It is best to use a container with a lid. This will make it easier to coat the chimichangas.


Now it is time to fill the tortillas. Fill the bottom third of the tortilla, dividing the cream cheese mixture between the 6 tortillas...


Fold the sides in..


...and roll them up! :)


Now you need to heat the butter on medium-high heat. 
Once it is sizzling hot...


...add the tortillas. 
You will need to rotate them, being sure to brown each side. This will not take long. They will only need a couple minutes on each side. 


When they are browned on each side, place them on a platter lined with a paper towel.


Next transfer them to the container of cinnamon sugar. Place the lid on and give them a gentle shake, being sure they are evenly coated. Transfer to a plate...


...and enjoy immediately while they are still warm. :)


Saturday, June 7, 2014

Summer Vegetable Medley

Recently my family had a very scary experience.  My wonderful father in law had a heart attack, which was completely unexpected.  He is recovering well, but along with rest and exercise (a little contradictory :), he has been put on a strict diet.
Learning new recipes and trying to make healthy choices is becoming fun and interesting to him. In sharing the knowledge he's acquiring, my husband and I are learning some easy, yummy ideas to keep in our refrigerator.  
Not that a heart attack at a young age will necessarily happen to us, but that scare was enough to motivate us to make even small changes if we can. 
So in trying to have healthier alternatives to choose from, I made this vegetable medley.  We think it's very good!  Also, it keeps in the refrigerator for up to a week!  Hopefully it won't last that long. :)


1/2 of a head of broccoli, cut in small pieces
1/2 of a head of cauliflower, cut in small pieces
4 carrots, diced small
1 small onion, diced small
4 stalks of celery, diced small
1/2 container of grape tomatoes
1/2 can of medium black olives
Newman's Own Light Balsamic Vinaigrette 
Balsamic Vinegar

This is so easy to do and so yummy.  Just cut up the veggies and pour approximately 1/2 cup of dressing over the veggies.  I also sprinkle a little plain balsamic vinegar because I like a little tang.  Put in a large container.  Covering it, shake well.  If you need a little more dressing when you serve it, you can always add it then.  


WISHING ALL YOUR FAMILIES HEALTH AND WELLNESS!  Let's not take it for granted!! :)

Tuesday, June 3, 2014

Lentil Chili


As mentioned in a previous post, my father recently had a heart attack.  Since his heart attack he has been on a vegan diet and, so far, has really enjoyed it. To make our meals healthier, my husband and I have experimented with our grub also. 

 It is a little difficult to change up your cooking style when, for me, meat was a priority in every meal; I picked the meat, then decide on the sides. I do believe it will get easier if I stick with it so that is what I intend to do! :)

 Although I was skeptical that chili would be good without ground beef, it was a good thing I gave it try.  This chili was very good.  It didn't even make you miss the ground beef!

I can't say I will give up my meat completely, but I am liking trying new recipes and not always staying in the same "meat & 3" mentality.

A couple adjustments I am going to make next time:

Cut down on the lime
Add pepper
Add a little more chili powder 

but...

WE LOVE SPICES!
(so adjust accordingly)

Lentil Chili

3/4 c. chopped onion
3/4 c. chopped celery
1/2 c. chopped carrots
1 med. chopped pepper
1 T. minced garlic

3 c. low sodium vegetable broth

2 1/4 tsp. chili powder
1/2 tsp. cumin
1/2 tsp. paprika
1/4 tsp. smoked paprika
1/4 tsp. cayenne

1 c. dry red lentils
1- 15 oz can low sodium crushed tomatoes
1- 15 oz can dark red kidney beans, drained and rinsed)

1/2 lime, zested and juiced
salt and pepper to taste


Mix chopped onion, celery, carrots, pepper, and garlic. 


Mix chili powder, cumin, paprika, smoked paprika, and cayenne in a small bowl.  


Gather all ingredients. 


In a large sauce pan, put 1 c. of broth and veggies over med/high heat.  


 Cook until veggies soften, about 5-7 minutes.


Add spices.  Stir.  Cook another minute.


Add lentils, kidney beans, tomatoes, and remaining broth.

Cover and bring to a boil over high heat.

Reduce to med/low and simmer until lentils are soft, approximately 45 minutes.


Stir in lime juice and zest just before serving.

Monday, June 2, 2014

Raspberry Chia Jam

I have another love. (Sorry, hunny.) I'm giddy and excited when I see them, can't wait to mix it up and try something new. It puts a smile on my face when I know that this weird -yet amazing- relationship is perfect. My new love's name?

Chia Seeds.

Yes, I know it's not a typical crush, and no, I'm not leaving my husband for some seeds, but oh, do I love them! Yes, LOVE. Besides the many health benefits I've read about chia seeds, they are just super versatile and fun. They may not be a huge flavor enhancer, but they make texture changes that are truly awesome.


You've already seen chia seeds in my post on Raisin & Almond Crunch Cereal.
You could also add them to the No-Bake Energy Bites, Naked-Inspired Green Machine Smoothie, or the  Fruit Medley Smoothie for an added nutrition boost!

This post, however, will give you another reason to love chia seeds! Not only do they go well in smoothies, cereals, and cookies, but you can also use them to make your very own, EASY, refrigerator jam!!!
Now, this is not your typical jam or jelly with the pectin and granulated sugar where you have to cook it down, then can it, and let it cool. This is a 4 ingredient, 5 minute, super simple fruit spread that is absolutely delicious.

It is perfect to use on homemade toast with regular butter, or any type of nut butter.
You could spread it on a whole grain cracker, or right over your Saturday morning flapjacks.
Maybe stir it into your frozen yogurt, or spread a spoonful over your Homemade English Muffins!


Ingredients

6 oz. carton fresh raspberries, cleaned
1/4 c. water
1 Tbsp. honey
3 Tbsp. chia seeds


Directions

Place your raspberries in a blender.
Add the honey, water, and chia seeds.
Blend well.
Transfer to a jelly jar.
Cover, and place in the refrigerator for at least 12 hours before using.


(Directions with Photos)

Place your raspberries in a blender.


Add the honey, water, and chia seeds.


Lookin' good...


Blend well.


(I didn't do it, but if you'd like the spread to be chunky, you can stir in small pieces of fruit now.)


Pour into a jelly jar.


Cover, and place in the refrigerator for at least 12 hours before using.


After 12 hours, your spread will be ready to use!

The chia seeds will gel up a bit and thicken the "jam" without having to use pectin or any cooking methods! Along with those perks, as well as not adding any granulated sugar, this has got to be one of the healthiest (not to mention easiest!) fruit spreads you can make!


I'm not sure how long this will last in the fridge, but I'm guessing about 7-10 days? We will see. :)

 I'm going to try different types of fruits next time! Maybe a combination of blueberries and raspberries, or strawberries and rhubarb...or blackberry! Ooh, this is going to be fun! :) 


Sunday, June 1, 2014

"Pizza" Portabella Caps

When I was grocery shopping this week, I noticed that the portabella mushroom caps were on sale. My husband hates mushrooms (he actually calls them "the devil's food"), but I love them. My sister posted some Cream Cheese Mushroom Bites that are delicious, so I thought I could use these mushrooms to make those, but when I got home, I realized I forgot to pick up crab meat. So, I changed up my plan and made these "pizzas" instead. 

They were so good, and definitely hit the spot for me! I will for sure be making these again! Probably on a night when Tony is not home, just to be nice. ;)


Ingredients

butter, softened
portabella caps, wiped clean
red onion, sliced
cream cheese
tomatoes, sliced
pepper jack cheese, shredded


Directions

Preheat oven to 350 degrees.
Gently rub the mushroom cap with butter, then flip upside down.
Place thin slabs of cream cheese inside mushroom to fill.
Saute red onion in a little butter until softened.
Place on top of cream cheese.
Top with tomato slices and a little shredded cheese.
Place on a baking sheet and bake for 15-25 minutes, or until cheese is melted and mushroom is cooked through.
Serve immediately.

**I didn't write the amounts of the ingredients, because I just kinda threw it all together. You may want different amounts of everything, so just make it how you'll like it. I like quite a bit of cream cheese, whereas you may prefer more pepper jack instead....or a lot of both. :)


Preheat oven to 350 degrees.
Gently rub the mushroom cap with butter, then flip upside down.
Place thin slabs of cream cheese inside mushroom to fill.
(I think it would be really good to add some fresh basil, too!)


Saute red onion in a little butter until softened.


Place on top of cream cheese.
Top with tomato slices.


 Add a little shredded cheese.


Place on a baking sheet and bake for 15-25 minutes.


When done, cheese will be completely melted and mushroom cooked through.


Serve immediately.
Yummy! :)


Check these out!