Search This Blog

Thursday, July 24, 2014

Spinach & Tortellini Salad

Okay, enough of the sweets. For now. I'm not sure what it is lately, but it seems like every post for me is something that will cure your strongest sweet cravings, as well as reduce the number of skinny waists out there.

 That will change now. I just have to share with you guys this recipe that I think is amazing! Not only is it the opposite of sweet, it's a SALAD. I know. I'm losing it. I don't think I've posted a salad since the Southwest Chicken Chop Salad back in March of 2013. Don't worry...I'm pretty sure I've eaten my fair share of salads since then. We just haven't made any that are worth posting. Generally, I think a salad is pretty self explanatory. You grab your greens, toss in some veggies, and pour a little (or a lot) of dressing on top. Good to go. (Are your salads any different?) That's basically what this recipe is, but it's got pasta in there, too. Hence, I'm hooked.

  I'm not huge on spinach salads, but this one... I love. The dressing has the perfect zing, and the tortellini really tops it off. We didn't eat it all for dinner, so we put the leftovers in the fridge. I wasn't sure how the spinach would hold up, but it was still good the next day! Win.

    Recipe Adapted from Food Network


Ingredients

9 oz. pkg. tortellini
zest of 1 lemon
juice of 1/2 lemon
1/2 tsp. garlic paste
1/4 c. olive oil
2 Tbsp. red wine vinegar
1 Tbsp. fresh thyme, chopped
salt and pepper, to taste
1/2 pound fresh baby spinach
1 can (14 oz.) artichoke hearts, chopped
1 roasted red pepper, chopped
1/2 small red onion, thinly sliced

Directions

Make the tortellini according to package directions.
Rinse in cold water, drain, and set aside to cool.
In a small bowl, combine the lemon juice, zest, garlic, olive oil, vinegar, thyme, and salt & pepper. Set aside.
In a large bowl, toss spinach, artichoke hearts, red pepper, and onion.
Gently toss in tortellini.
Drizzle dressing over salad and toss.
Serve immediately or refrigerate until ready to serve.


For the tortellini, we chose Buitoni's Whole Wheat Three Cheese, but you can use whatever you prefer.
After it's cooked, we spread it out on wax paper so it could cool without sticking to each other.


I love how simple this recipe is!


Doesn't the dressing look delicious??


Be sure when chopping the artichoke hearts, that you remove all the tough skins. They are usually pretty soft, but sometimes there are still a few toughies in each can.


Sooo delicious!


Enjoy!!


Wednesday, July 23, 2014

Black Bean Brownies

Have you ever heard of making brownies with black beans?? Whoever came up with the idea is a genius. When I first heard about black bean brownies, I imagined dry, cakey "brownies" (of course they can't be real brownies!) that were bland, beany, and, honestly....gross.

I was wrong.

They are chocolatey, just the right amount of sweetness, and absolutely the opposite of dry and cakey. These brownies come out thick and fudgy! You can't taste the beans AT ALL. You even get the little melted bits of chocolate chips throughout the brownies that make it the perfect combination with the ooey, gooey deliciousness.

Best part? They are made with whole wheat flour! No eggs! No oil! 
Can I get a "whoop, whoop!"?

My husband says they taste too "healthy", but I seriously think it's all in his head since he knew BEFORE he tried one that they were made with black beans. I should have thought to try the whole "trick my husband" routine and not tell him what the ingredients were until after we ate the whole pan. :)


Ingredients

1 can black beans
*water
1 1/2 c. whole wheat pastry flour
2 1/4 c. raw cane sugar
1 1/4 c. cocoa powder
2 Tbsp. ground coffee (ground very fine)
1/2 tsp. salt
1 tsp. baking powder
1 tsp. vanilla
1 c. water
1 c. chocolate chips


Directions

Preheat oven to 350 degrees.
Spray a 9x13 inch pan with nonstick spray and set aside.
Rinse and drain the black beans until the water runs clear.
*Return the beans to the can and fill with clean water.
Pour the beans and water in a blender and blend until smooth. (You don't want little bean bits. Ew.)
In a large mixing bowl, combine the flour, sugar, cocoa, coffee grounds, salt, and baking powder.
Add the pureed beans, vanilla, and the 1 cup of water.
Gently stir in the chocolate chips.
Spread into the prepared pan and bake for 35-45 minutes or until toothpick comes out clean.
Let cool completely before cutting.


Monday, July 21, 2014

Crunchy Caramel Popcorn


Ingredients
4-5 quarts of popped popcorn
2 cups firmly packed brown sugar
1 cup (2 sticks) butter
1/2 cup corn syrup
1 Tbsp molasses 
1 tsp salt
1/2 tsp baking soda

Step 1: Heat oven to 225 degrees. Place popcorn in cake pan. set aside

Step 2: Mix together brown sugar, butter, corn syrup, molasses and salt in a thick-bottomed, 2-quart saucepan. Cook over medium heat, stirring occasionally, until mixture comes to a full boil. Continue cooking, stirring occasionally, for about 12 to 14 minutes. Remove from heat... stir in baking soda. The caramel will foam up a little and turn a lighter color when you add the baking soda.

Step 3: Carefully pour the hot mixture over the popcorn in a large pan. (If you would like peanuts with your popcorn, sprinkle the salted peanuts over the caramel sauce at this point.) Using a wooden spoon, stir until all popcorn is coated. (Be careful not to let the caramel touch you... it's very hot.) Place in oven for 25 to 30 minutes. Stir to more evenly coat the popcorn with the caramel sauce. Immediately spread caramel corn out onto waxed paper.
 Let cool completely. 


Hope you Enjoy!!! :)

Wednesday, July 16, 2014

Chocolate Caramel Oat Bars

Okay, I've already given you the recipes for the oh-so-scrumptious Peanut Butter Bars and the Chocolate Coconut Dream Bars. Now it's time for the final recipe of the bars we served at my brother's graduation party! Though my little sister decided that her favorite ones were definitely the Peanut Butter bars, these Chocolate Caramel Oat bars were MY favorite. Let's see what you choose. :)

Drum roll please...


Ingredients

1 1/2 c. brown sugar
2 c. flour
2 c. old fashioned rolled oats
2 tsp. baking soda
1 1/2 c. butter, melted
2 c. chocolate chips
64 caramels, unwrapped
1 c. heavy cream


Directions

 Preheat oven to 350 degrees.
Combine brown sugar, flour, oats, and baking soda in a large bowl.
Pour melted butter over the mixture and mix until well combined and crumbly.
Press half of the mixture in an ungreased 9x13 inch pan.
Place pan in the oven and bake for 10 minutes.
While the crust is baking, pour the cream over the caramels in a microwave-safe bowl.
Melt in the microwave in 30 second intervals, stirring each time, until smooth and creamy.
Sprinkle the chocolate chips over the baked crust.
Pour the caramel evenly over the chocolate chips.
Crumble the remaining oat mixture over the caramel.
Bake another 15-20 minutes or until edges are slightly golden.
Let cool completely before cutting.
Store and serve at room temperature.


(Directions with Photos)

 Preheat oven to 350 degrees.
Combine brown sugar, flour, oats, and baking soda in a large bowl.


Pour melted butter over the mixture and mix until well combined and crumbly.
(Sometimes you may have to use your hands to combine it all well enough. Just sayin'...)


Press half of the mixture in an ungreased 9x13 inch pan.


Place pan in the oven and bake for 10 minutes.


While the crust is baking, pour the cream over the caramels in a microwave-safe bowl.
Melt in the microwave in 30 second intervals, stirring each time, until smooth and creamy.


Sprinkle the chocolate chips over the baked crust.


Pour the caramel evenly over the chocolate chips.


Crumble the remaining oat mixture over the caramel.
(You can just sprinkle it over the bars. However, I like "oat chunks" on my bars, so I usually grab a handful of the mixture, give it a good squeeze, then sprinkle it over the top.)


Bake another 15-20 minutes or until edges are slightly golden.


Let cool completely before cutting.
Store and serve at room temperature.


Monday, July 14, 2014

Chocolate Coconut Dream Bars

A couple weeks ago, I posted the Peanut Butter Bars that I made for my brother's graduation party. It seemed only right that I give you another recipe that we made for that particular celebration. 

 There are many similar versions of this recipe with a whole slew of names for them. 
Hello Dolly Bars, Magic Cookie Bars, Seven Layer Bars,  Magic Layer Bars....

I call them Chocolate Coconut Dream Bars.

And, yes, they measure up to their name! You're actually supposed to wait until they're completely cool before cutting them. I got a little anxious to put them in their storage containers (mostly so I wouldn't eat them all!) so they look a little sloppy. If you actually let them cool, they should look a little neater. :)


Ingredients

1/2 c. butter, melted
2 c. graham cracker crumbs
1 c. chocolate chips
1 c. butterscotch chips
1 1/2 c. shredded coconut
1 c. pecan pieces
1 can sweetened condensed milk


Directions

Combine graham cracker crumbs and melted butter and mix well.
Press into the bottom of a 9x13 inch pan.
In a medium bowl, combine chocolate and butterscotch chips, coconut, and pecans.
Sprinkle over graham cracker crust.
Pour sweetened condensed milk evenly over the top.
Bake at 350 degrees for 25-30 minutes.
Let cool completely before cutting.

*******************************************************************

(Directions with Photos)

Preheat oven to 350 degrees.
Melt butter in microwave-safe bowl.
Combine graham cracker crumbs and butter and mix well.


Press into the bottom of a 9x13 inch pan.


In a medium bowl, combine chocolate and butterscotch chips, coconut, and pecans.


Sprinkle over graham cracker crust.


Pour sweetened condensed milk evenly over the top.


It will seep in a bit...that's okay! :)


Bake at 350 degrees for 25-30 minutes.


Let cool completely before cutting.


If you get impatient like me, yours will probably be a little messy like these.
They are still delicious, just not as pretty. Hehe! :)


Friday, July 11, 2014

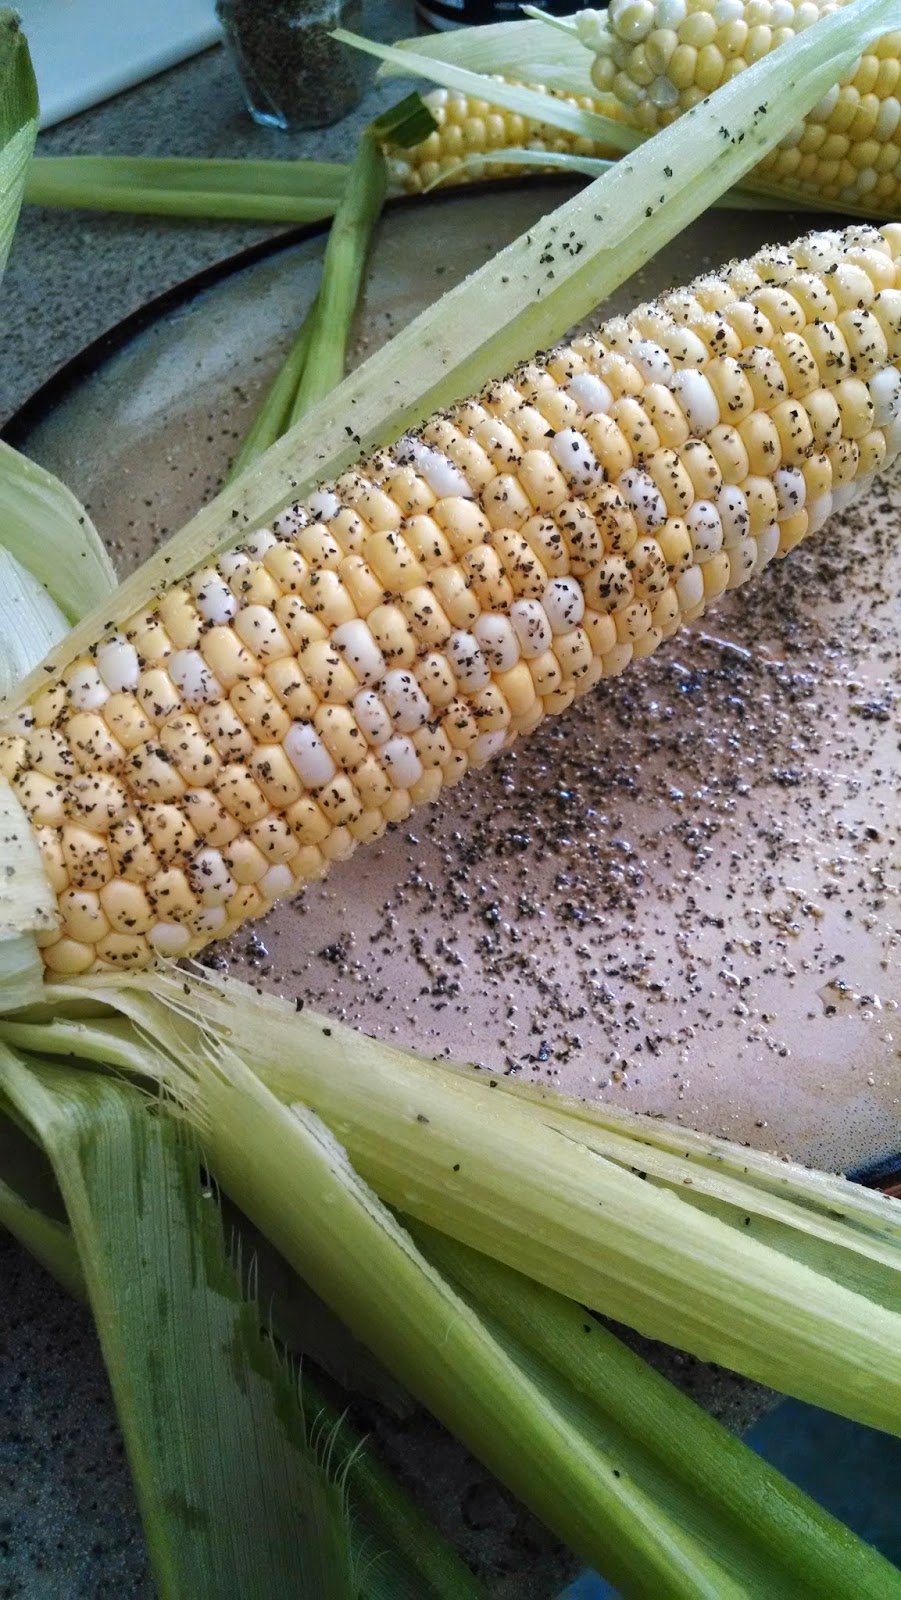
Perfectly Grilled Sweet Corn


I found out this past weekend that I take grilled sweet corn for granted. It just ends up on your plate and you enjoy the fruits of someone else figuring out how to make it "just right".

Grilled sweet corn is so simple... or so I thought.  After 6 of us standing in the kitchen, going back and forth deciding if Bobby Flay or AllRecipes.com would be better, we decided what we would do. 

I am not so much sharing this with you because it's so hard to do (you probably know how to grill corn), I am doing this so that I remember the next time. :)  I don't want to waste time discussing when I could be enjoying this yummy summer treat. 


Here it goes:

1. The first thing I did was clean out the silk.  Carefully pull the husk back.  
After removing all the silk, replace the husks. 


2. Soak in salt water for an hour. After about 45 minutes of soaking, start the grill. 

3. Open and spray (or brush) olive oil on the corn. 

4. Sprinkle with the seasonings of your choice. Good ol' salt and pepper for me.


5.  Replace the husks again, and tie the corn shut using a small strand of husk. (You could also use kitchen twine if that's really not working for ya.)


6.  Put aluminum foil on the grill. (FYI...we started a fire because we didn't do that at first) :)


8. Cook for approximately 45 minutes, turning frequently.


                                                                            AMAZING!


Thursday, July 3, 2014

"Daily Planner" Printable

I don't know about you...but I am a 'list' person!  My kids can tell you stories about their mom, and her obsession with her "Daily Planner." I am just about sure it will put a smile on each of their faces when they think of this. :)

I realize there are organizational apps available on smartphones and computers, but I still prefer a nice pen and paper!  I have made many planner pages throughout the years. I have changed them time and time again, but I have found that this page has worked best for me. 

 Being a homeschool mom and the secretary for our parish (I have a separate planner page made especially for when I go to the office!), I need to organize my time as best as I can.  I need all the help I can get, and this page gives me a sense of accomplishment. Especially, when I can check off the boxes! :-)


I wanted to share this with you and I hope you can use it to help organize your life! 

Take Care and God Bless your Day!


Check these out!