Search This Blog

Friday, May 30, 2014

White Chicken and Spinach Lasagna


I am a huge fan of lasagna-- sauce, beef, cheese...the whole works.  I was struggling trying to find some new recipes to try out, and I was voicing my frustration to my sister.  She told me that I should try a White Chicken lasagna.  Having only ever made the tomatoey goodness that is "traditional" lasagna, I was a little skeptical.  
But after having made my meal plan, which looked rather boring and kept repeating with the same ol' same ol', I decided that it wouldn't hurt to give this a go.  
Worth it!! My husband really liked it and the sauce was really yummy.  Next time I make it, I am going to play around with a little more spice and see what I get; for a first time, there was no complaints. :)

White Chicken and Spinach Lasagna

Sauce:
4 T. butter
1 white onion
1 T. minced garlic (we love garlic--I will probably use even more next time.)
6 T. flour
1 c. low sodium chicken broth
2 1/4 cups milk
3/4 teaspoon dried basil (I only had fresh basil so I used 1 T.)
3/4 tsp. dried oregano
1 tsp. salt
1/2 tsp. pepper

Lasagna:
9 lasagna noodles (I boiled them until they were almost ready)
15 oz. ricotta cheese
2 cups prepared chicken chunks
1 pound mozzarella cheese (I used more like 2 lbs.  Don't judge. ;)
1 1/2 c. parmesan cheese (reserve 1/4 c. for the top)
18 oz. fresh spinach (I only used about 12 oz.  My pan was so full, I don't know if I could have even gotten all the spinach it called for in the pan.  Good luck to you.  It does look like a bunch, but it cooks down.
1 T. fresh parsley


Gather all your ingredients for your sauce.  I mixed the broth and the milk together, in case you were wondering where the broth was.  


In a large saucepan, melt butter.  Saute onions for approximately 4 minutes or until translucent and tender. 


Stir in garlic. 


Add flour, stirring constantly.  Allow to cook for about a minute, making sure to continue to stir.


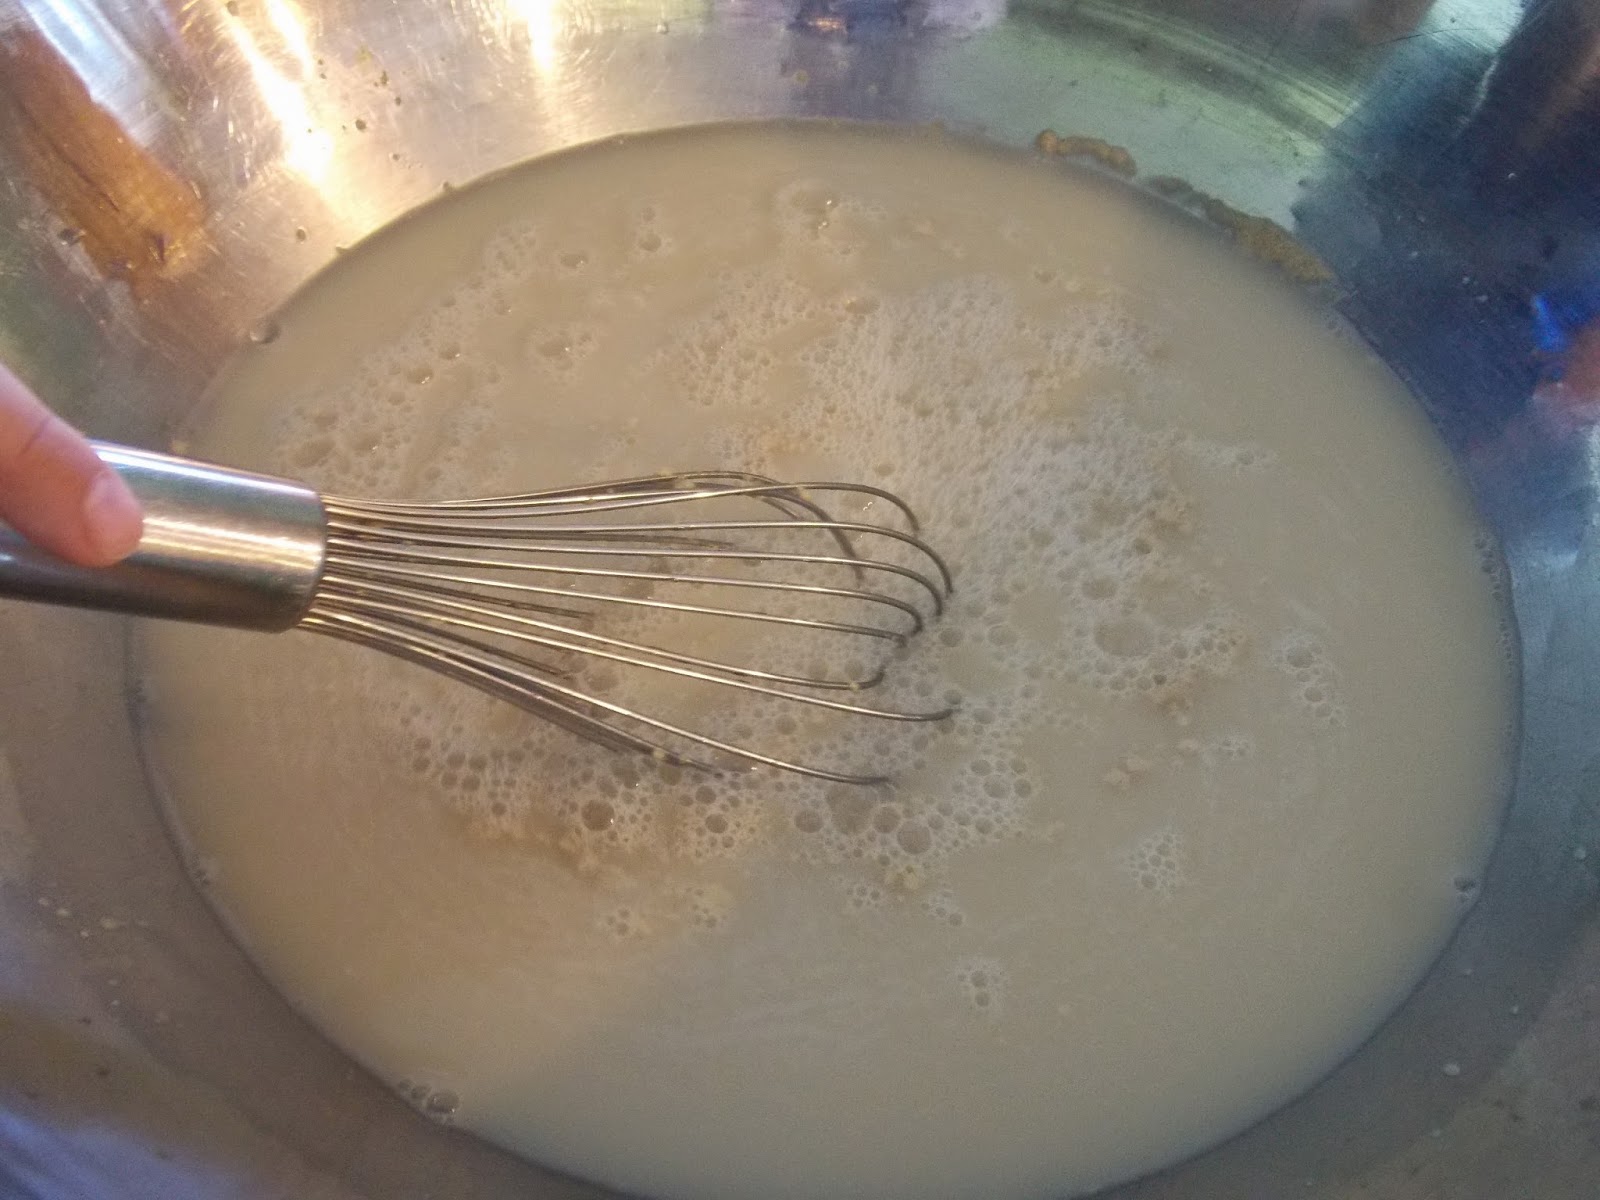
Gradually add the milk and chicken broth while whisking vigorously to make it all smooth.  


Add in the seasonings.  Bring to a simmer.  


Continue to let it simmer, approximately 5 minutes or until it has thickened. 


Gather all your ingredients to layer your lasagna. Don't forget to reserve 1/4 c. parmesan for the top of your lasagna. 


 Start by spooning in 1 1/2 cups of prepared sauce on the bottom of a 9 x 13 pan.


Layer 3 partially cooked lasagna noodles.


Dollop half of the ricotta contents as the next layer. 


Next, spread half of your chicken.


Divide your spinach in half and layer next.


Put on your mozzarella cheese...what the recipe calls for or what you like. :)


Sprinkle on half the parmesan cheese, excluding the reserved amount for the top. 

Carefully press the layer down with your hands.  It almost appears you won't get another layer on there but you will. :)


Place 3 noodles over the top.  Pour half of remaining sauce on top of the noodles.  Repeat layers (remaining ricotta, chicken, spinach, mozzarella, parmesan.)

After completing the layer, put the last 3 noodles on top.  Pour the remainder of the sauce.  Top with reserved parmesan cheese.


Cover with lightly greased aluminum foil.  Bake at 350 degrees for 40 minutes.  Uncover and bake for 15 minutes until bubbly.
(I removed the aluminum foil for the picture so you could see the process. )


At the end, I turned the broiler on to get it a little crispy on the top.  That is obviously optional.


  YUMMY GOODNESS!  ENJOY!


Wednesday, May 28, 2014

Buttered Spinach with Cheese


I love when it takes 5 minutes to whip up a healthy side dish.  I love it even more when my kiddos beg for seconds! :) 


~BUTTERED SPINACH WITH CHEESE~

For this delicious side dish, you will need:

8-10 oz  Fresh Spinach
2-3 Tablespoons Butter
Grated Parmesan Cheese 
Salt and Pepper
Water
Large skillet with a lid


Put a small amount of water in the bottom of a large skillet. (Just enough to coat the bottom of the pan.)
Fill with spinach.

This may seem like a lot of spinach but it will wilt and cook down to a small amount.  My oldest, Evan, is always asking, "Mom, can you just make two whole bags?" :)  He loves spinach. ..I can't complain 
about that.  :)

Put the lid on the skillet and turn 
on high. This will allow the spinach to
"steam".

Cook for a few minutes, stirring once or twice.
When the spinach is completely wilted, yet
still a vibrant green, drain off any excess water. Return to heat and turn down to low.

Now add the butter (sliced in chunks), salt, and pepper.
Stir to combine.

Sprinkle the parmesan cheese on top. 
Replace the lid until it melts.


Serve immediately! Enjoy!

Monday, May 26, 2014

Old Fashioned Cream Cheese Mints

  These old fashioned cream cheese mints are also commonly known as wedding mints.... my Dad remembers his Mom making these for special occasions!!! :)

You can switch it up to fit your tastes, using any flavoring you want. Experiment, and let me know if you find any flavors you really like!!!


INGREDIENTS

4oz. Cream Cheese (softened)
4-5 c. Powdered Sugar
1/4 tsp. Peppermint Extract, or any other flavoring
Food coloring
White Sugar


Beat the cream cheese until smooth....


Gradually add powdered sugar....


Blend in flavoring. (You can add more or less depending on how strong you want them)


Add food coloring to tint the color that you'd like them...


 Mix powdered sugar to make it a stiff dough...


Roll into small balls... 


Roll in sugar.... 


You can use a press to shape them the way you want... (Or the bottom of a glass cup)

Let them set on the counter overnight.

Store in an airtight container. You can also freeze them!


Hope you enjoy!!! :)


Thursday, May 22, 2014

Salami Roll Ups

How often do you go to a get-together or potluck and not see a meat and cheese tray? Almost every time there are slices or cubes of cheese, turkey or ham, and a variety of buttery crackers. You see it often because almost everyone likes it. But why not switch up the norm and go with these Salami Roll Ups instead? 

You can use any type of meat you want for these little pinwheels. I used salami, obviously, and green pepper inside. I think they would be delicious with some minced dill pickle in there as well! You can certainly make them right before you serve them, but they taste best when prepared the day before.


What You Need:

8 oz. package deli-style hard salami
6-8 oz. package cream cheese, softened
1/2 green pepper, sliced thin

What To Do:

1. Place a piece of plastic wrap on a clean surface.

2. Lay out the meat on the plastic wrap, overlapping the edges so there are no gaps.


3. Next, spread the cream cheese over the meat. (I had to smush and spread it around with my fingers quite a bit so the meat didn't lift and separate.)


4. Place the slices of green pepper randomly all over the cream cheese. (Add any other veggies you'd like, just don't overfill it.)


5. Gently lift the edge of the plastic wrap and bend inward.


6. Tuck the edge in, move the plastic wrap out of the way and carefully begin rolling.


7. Continue rolling, using the plastic wrap to help as a guide.


8. After it's all wrapped up like a log, secure the plastic wrap around it.

9. Refrigerate at least 2 hours or until ready to serve. (Best when given at least 12 hours in the fridge.)


10. Just before serving, slice into 1/3-1/2 inch slices.


11. Place on a serving tray and serve with your favorite crackers.


12. Enjoy! :)


Wednesday, May 21, 2014

Bread Baking Day!


I don't know about you.... but I like to combine my efforts, so that I can feel good about my time spent.  This is why I like to use my favorite bread recipe, and make regular loaves of bread, French loaves, and buns all at the same time.  

Yes, they come from the same recipe, but they truly seem to have their own individual taste!  Sometimes, I will put the dough in the freezer and use it as a pizza crust or breadsticks, too!  (For breadsticks, roll out the dough, spread melted butter over the top, then sprinkle with garlic powder, parmesan cheese, and Italian seasoning. Cut in strips with a pizza cutter and bake 'til golden brown.) It is always a plus to have already made dough in the freezer when you are looking for a quick meal.

When I make bread for our family, I triple the batch, so keep that in mind when you see the pictures.  The recipe below is for a single batch, which will make 4 regular size bread loaves. (If you want to do buns or breadsticks, just change it accordingly.) Thanks to my daughter, Tricia, I have a nice large stainless steel bowl that I can use for the triple batch.

You will need:

4 1/2 Cups warm water
2 pkgs. (4 1/2 tsp.) yeast
6 TBLS. sugar
2 TBLS. salt
14-15 cups white flour (or 1/2 white-1/2 wheat flour)
4 TBLS. butter, melted


1. Pour yeast over warm water with sugar.


2. Add a little of the flour, then pour the salt into the mixture and stir.


3. Gradually add the remaining flour until you get a rough dough. Turn out on floured surface and start to knead.
(Be careful not to add too much flour. You want the dough to still be pliable.)


4. Knead using the heel of your hand.


5. After kneading for about 5 minutes...form a nice ball.


6. Pour oil in your bowl and spread it around.


7. Lay the dough in the bowl then turn it over to coat the dough lightly with oil.


8. Cover with a clean, damp towel.


9. Make sure the towel is loose for the expansion when it rises.


10. Let rise in a warm place for about an hour or until doubled.


11. Once doubled, make a fist and punch dough down.


12. Grease your pans with oil.


13. Divide dough for what you'll be making.


14. Cut into sections. (Remember that I did a big batch, so you may not need to divide it this much.)


15. Divide the sections.


16. Start to form each section into loaves. You can also make buns
at this time if you choose to. (Make them about 1/2 the size you want them because they will rise.)


17. Put into pans.  (Today I made regular loaves, long French loaves and a round loaf.)
Let rise until doubled again.


18. After they've risen, bake for about 40 minutes at 350 degrees or until golden brown and when you tap it, it sounds hollow. (Keep in mind that the time will vary depending on the sizes of what you made.)

19. Remove from the oven and brush the butter on top of each baked loaf.


Here is my little guy with the completed loaves! 
Now, to get a knife and some butter!  Yum
Warm bread always puts a smile on your loved ones faces!


Check these out!