Search This Blog

Friday, January 10, 2014

Pumpkin Roll


Walking into Kroger, my husband and I saw a table full of goodies--soon to be "expired" holiday ingredients.  I don't know how everyone else feels, but I think whoever had the idea to put this stuff right at the front door is genius.  Prior to seeing that table, our list consisted of about 3 things.  Walking out, we had MANY more items in our grocery bags.  In those bags, Libby's Pure Pumpkin ended up being one of the added items.  The BIG can for $0.99!  Heck yes!!
Now aside from making my usual pumpkin pie during the holidays, I have never experimented with pumpkin.  I don't know why.  I love it.  Well, this past Thanksgiving, my sister in law's boyfriend brought a delicious pumpkin roll that his sister had made for him to share.  Remembering that, I decided to venture from the comfort zone of my normal pumpkin pie and give this new (for me) dessert a try.
Although I have never made a jelly roll of any kind, which is why I do not have a jelly roll pan, I made the best of it.  Using a half sheet, which is a little bigger than a jelly roll pan, I crossed my fingers.  Worst case scenario, it's a large flop.  Mediocre scenario, the roll falls apart but I learned the recipe was good. (...and I would know a jelly roll pan would be in my future. ;) Best case scenario, it all works great!

Well folks...it worked great.  You should definitely try this recipe.  I found it when I looked up Libby's Pumpkin Roll.  I am not advertising, but I would like to note, in my opinion, Libby's 100% Pure Pumpkin is the best pumpkin to use. :)


Preparation:
  • Preheat the oven to 375 degrees.  Grease 15 x 10 jelly roll pan; line with wax paper.  Grease and flour paper.
  • Sprinkle a thin, cotton kitchen towel with powdered sugar, making sure to use enough powdered sugar so your cake won't stick.
  • Set a cooling rack to the side.  
Cake:

1/4 cup powdered sugar (to sprinkle on towel)
3/4 cup all-purpose flour
1/2 teaspoon baking powder
1/2 teaspoon baking soda
1/2 teaspoon cinnamon
1/2 teaspoon ground cloves
1/4 teaspoon salt
3 large eggs
1 cup granulated sugar
2/3 cup Libby's 100% Pure Pumpkin (the only kind to use!!)
1 cup walnuts, chopped (optional)

Filling:

1- 8 oz. package of cream cheese
1 cup powdered sugar
6 Tablespoons soft butter
 1 teaspoon pure vanilla


Directions:
  • Combine dry ingredients-flour, baking powder, baking soda, cinnamon, cloves, and salt- in a small bowl.  
  • In a large bowl, beat eggs and granulated sugar until thick. 
  • Beat in pumpkin.
  • STIR in flour mixture. 


  • Spread evenly in pan. (As I stated above, I did not have a jelly roll pan.  Using a half sheet, which is a little larger than a jelly roll pan, I spread the batter almost to the edges.  It worked great as an improvisation. )

  • Bake 13 to 15 minutes or when cake "bounces" back when touched. 


  • When finished baking turn pan over on powdered sugar towel immediately. 
Excuse my pan!  I guess I should use one of our posts on how to clean your cookie sheets.  To see how to clean your pans, click HERE!


  • Carefully remove hot pan. 


  • Slowly peel off the wax paper. 


  • Starting at the narrow end, carefully start rolling. 


  • Roll....roll....roll.....


  • Roll until you reach the end of the towel. 


  • Place on a cooling rack and allow to sit for approximately an hour or until cool. 


  • As your roll cools, get ingredients around for your filling.


  • When the hour is almost up, combine filling ingredients and blend until smooth. 
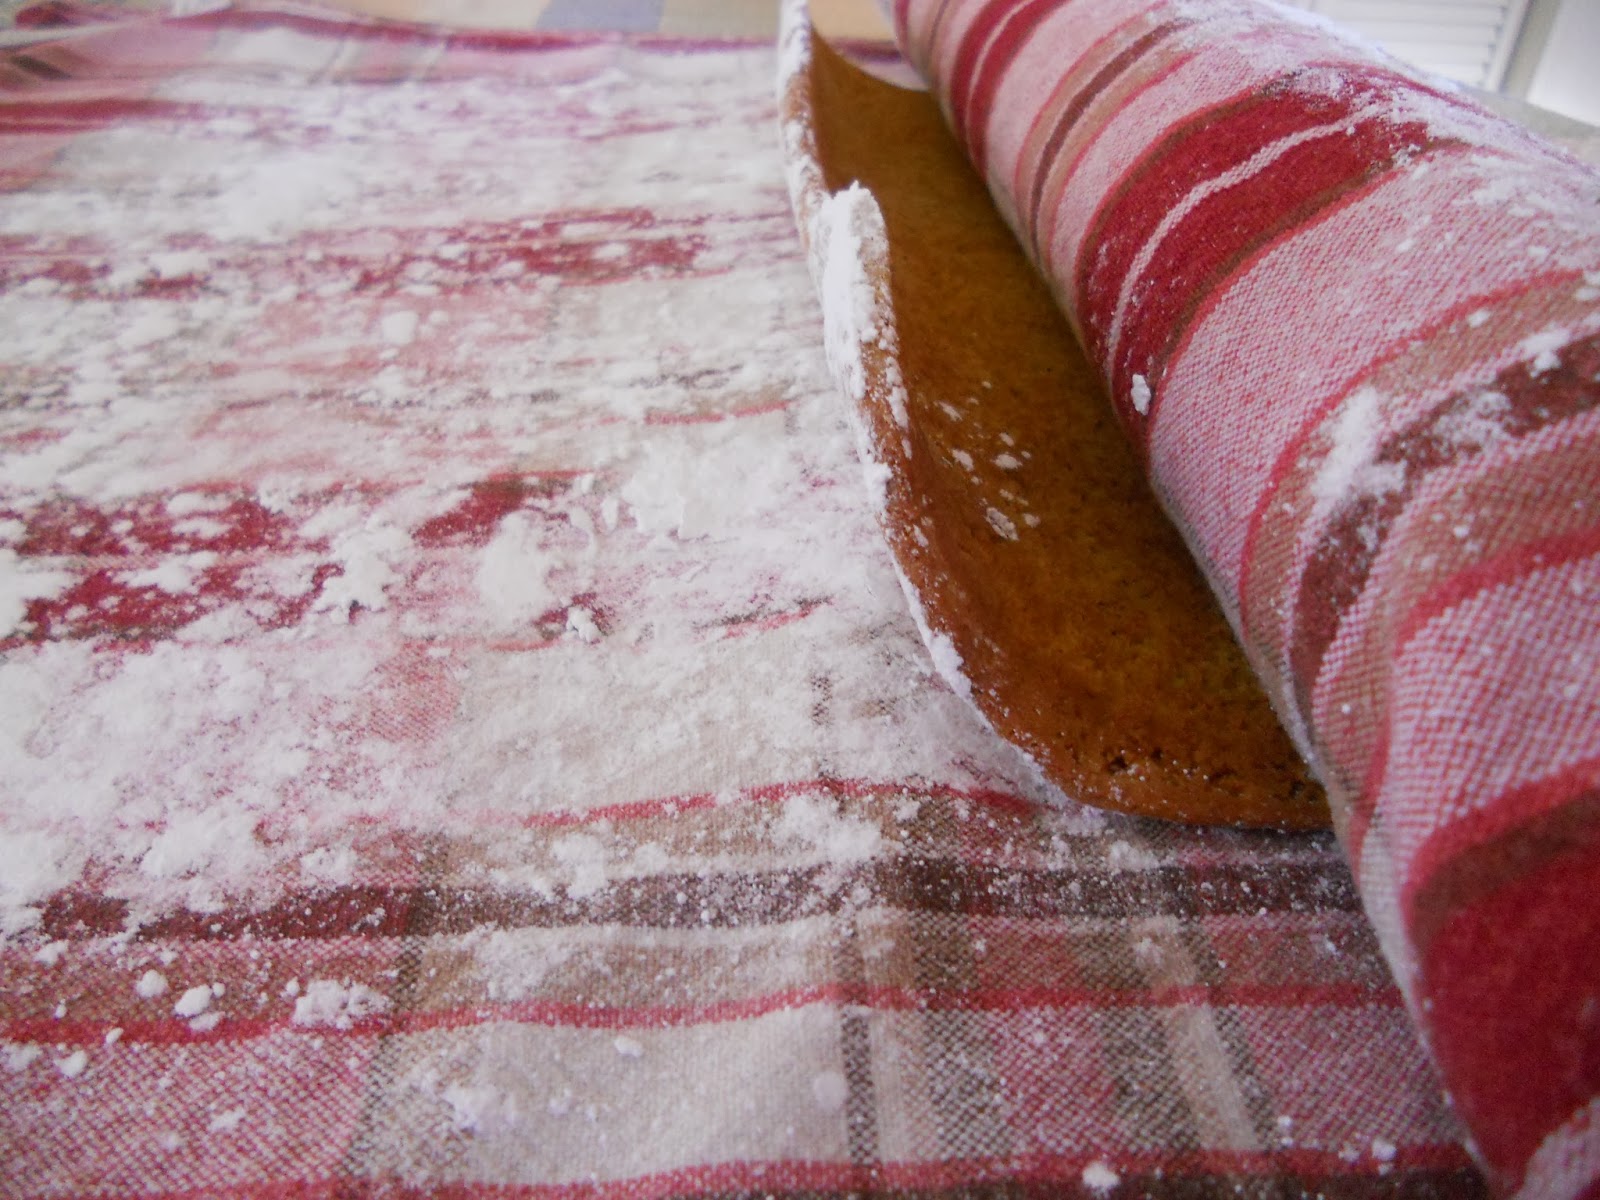

  • After your roll has completely cooled, carefully unroll. 


  • Spread filling evenly on your cake.


  • Once again, carefully roll to the end.


  • Cover with plastic and refrigerate at least 1 hour.  I did not have plastic wrap so I used wax paper and aluminum foil.  I was all about improvising today. :)


Using dental floss, I carefully cut my roll.  If you don't know how to do this, it's easy.  Using a long piece of floss, slide the middle of the floss under the roll.  Bring the floss over the top and cross sides.  Pull evenly and you will cut pretty pieces every time. 

ENJOY!

Wednesday, January 8, 2014

Chicken Bacon Ranch Ring


Chicken. Bacon. Ranch....some of my favorite foods!! :)
 As a busy homeschooling mom, I am always on the look-out for quick lunch ideas. 
This may not be my fastest lunch "go-to" but it definitely is a good one! :)

Ingredients:

4 cups chicken breast, fully cooked and diced
2 packages refrigerated large crescent rolls
1/2 cup real bacon pieces (or 6 slices bacon, cooked and crumbled)
1/4 cup sour cream
1/4 cup mayo 
1 Tbsp. Ranch dip mix (I use a fabulous homemade recipe posted by my sister, Renae. For this recipe CLICK HERE.)
1 1/4 cups mozzarella cheese, shredded
2 tsp dijon mustard
1-2 roma tomatoes
salt and pepper

Serves: 8

Preheat your oven to 375 degrees. 
Place your cooked and diced chicken in a large bowl. Salt and pepper to taste. 


In a medium bowl, combine the mayo, sour cream, ranch seasoning, bacon pieces, mustard, and 1 cup of the mozzarella cheese.  Mix well.  Add to the chicken and stir until thoroughly combined.


Next open the packages of crescent rolls. This recipe works best if you use the LARGE rolls rather than the original size. Arrange them in a star-like pattern on a large round stone. Perfectionism is not necessary. It always looks good and tastes yummy in the end. :)


Using a small roller, roll the wide ends until they are all pressed together. That is the best way I know how to describe it. ;)


Next, using a large scoop, arrange your chicken around the "ring". 


Thinly slice the roma tomatoes and arrange on top of the chicken mixture.


Now simply bring the pointed ends of the rolls over the chicken and securely tuck the edges underneath on the inner part of the ring.  That sounds way more confusing than it actually is. Thank goodness for pictures, right?? :)


When you are all done tucking, it should resemble something like this. Now place your ring in your preheated oven (375 degrees). Bake for 30 minutes or until golden brown. Sprinkle the remaining 1/4 cup cheese on top of the ring when there is approximately 5 minutes left of baking time. 


Not too shabby for a quick lunch, right?? :)
And for the extreme ranch lovers: A drizzle of ranch salad dressing on top is completely acceptable! :)


Monday, January 6, 2014

Crock Pot Shredded Buffalo Chicken

How has your first week of 2014 been? Some friends of ours had a few people over on New Years Eve, and as I was talking to one of the girls, she told me about this shredded buffalo chicken recipe that you make in the slow cooker. With my sisters visiting this weekend, we wanted an easy meal so we could spend our time playing games instead of cooking. I remembered the recipe she told me about, and decided it would be a good night to try it. Oh my goodness! This recipe is SOOO easy and yummy!

Ingredients

3 lb. frozen chicken breasts
16 oz. buffalo sauce
1 packet ranch dip/dressing mix

Directions

Place the frozen chicken in the crock pot.
Pour the buffalo sauce over the chicken.
Sprinkle the ranch mix over the sauce.
Cover and cook until the chicken is fully cooked.
High: 3-4 hours              Low: 6-8 hours
Once the chicken is fully cooked, remove from the slow cooker, and shred the chicken.
Return the shredded chicken to the sauce in the slow cooker until ready to serve.


***********************************************************************


(Directions with Photos)

Place the frozen chicken in the crock pot.


Pour the buffalo sauce over the chicken.
(We used the Sweet Baby Ray's Buffalo Wing Sauce.)


Sprinkle the ranch mix over the sauce.


Cover and cook until the chicken is fully cooked.
High: 3-4 hours              Low: 6-8 hours


(There is no need to stir the mix in before cooking the chicken. It will all get mixed up later. 
However, if you prefer, you could stir the sauce and mix together before pouring over the chicken.)


Once the chicken is fully cooked, remove from the slow cooker, and shred the chicken.
(If you have a Kitchen Aid mixer, place the hot chicken in the bowl, and use the paddle to shred the chicken perfectly!)


Return the shredded chicken to the sauce in the slow cooker until ready to serve.


We toasted a roll and loaded it up with the buffalo chicken, sauteed red onion, and pepper jack cheese, but there are many things you could do with this chicken! 

Using either of these pizza dough recipes (Mom's Homemade Pizza Crust or Quick Rising Pizza Crust), you could make buffalo chicken pizza, or roll the buffalo chicken up in this easy Pizza Bread that was posted by my mom. It would also be great to use for these Buffalo Chicken Bites!

If you have another idea for this chicken, I would love to hear about it! :)


Friday, January 3, 2014

Frozen Chocolate Banana Bites


This is a very quick and easy recipe that my sister Renae told me about! Whether you want to use them for a quick snack, or to have them for a delicious (yet simple) dessert, these are perfect for anything!!
Ingredients:
  • Your favorite chocolate
  • A banana or two
  • Nuts (optional)
 

First, completely melt your chocolate in the microwave or using a double-boiler!


Cut your banana in even pieces, about 1/2 inch thick.


Completely cover the banana in chocolate. (If needed just melt more chocolate.)


Lift the banana out of the bowl with a fork. Gently tap the edge of the bowl so the excess chocolate drips off and leaves you with a smooth coat.


Set the chocolate covered bananas onto a pan covered with one sheet of parchment or wax paper.


Before you set these into the freezer, if you would like to add your favorite nuts, sprinkle or set them on top of the dessert! We used pecans which personally I thought tasted better.


Freeze for at least 2 hours. 
If you would like to keep some in the freezer, transfer to a ziploc baggie after they are frozen.


When you are ready to eat them, remove from the freezer just before serving.


Wednesday, January 1, 2014

Party Meatballs


A quick and yummy dish!
Just a note:  After I made these meatballs, I cooled them and put them in the freezer.  It was so easy just to take them out of the freezer, thaw a bit, and put them in a slow cooker to warm! They were ready to enjoy in a couple of hours and didn't have the mess right before the party!
(Sorry I didn't get a picture of them being served in the crockpot). 
This recipe was shared with me from my daughter, Renae.
Oh, how I love sharing and receiving recipes!  : )  I think recipes are something so special.  Whenever I make a recipe from someone, it always gives me fond thoughts and memories of the person that was so thoughtful in giving it to me. : ) 
This is such a great dish to pass for those holiday parties or as
a main dish for a family meal.  Either way, I am sure you will
enjoy these as much as our family does! 
So, get yourself these ingredients, mix them up,
bake these meatballs and enjoy!
Combine the following ingredients:
1 egg
1/3 cup evaporated milk
1 cup quick oats
1/2 cup finely chopped onion
1 1/2 lbs. ground beef
1 teaspoon salt
1 teaspoon chili powder
1/4 teaspoon garlic powder
1/4 teaspoon pepper

Form into 1 inch balls or to the size you would like. 
(I used the small Pampered Chef scoop.) 


Place on slightly greased cookie sheet, making sure
they are not touching too close.


To make sauce combine the following:

1 cup ketchup
3/4 cup packed brown sugar
1/4 cup chopped onion


Preheat the oven to 325 degrees. Stir ingredients
for sauce until mixed well.


Pour the sauce over meatballs before baking.


Bake, uncovered, at 325 degrees for about 1 hour.


Remove from oven and let stand for a few      
minutes before placing in a serving dish. 

**They taste really good when served with mashed potatoes
and a vegetable for a meal, or as an appetizer for a party. 

Either way...Enjoy!


Monday, December 30, 2013

Honey-Oat Crunchy Granola Bars

While grocery shopping this week, I picked up a box of Nature Valley Oats 'n' Honey granola bars. After a minute I started thinking, "Why am I buying these when we have all the ingredients in our cupboards to make them at home?" We've gotten so used to the convenience of just picking up snacks again that I forget how easy (& cheaper!) it is if I just decide not to be too busy or lazy to make them myself. Maybe that should be part my New Year's resolution. Hmm.

We have a couple of granola bar recipes posted on our blog already... Quick & Easy No-Bake Granola Bars, and Toasted Coconut & Berry Granola Bars. Both are super delicious, but they are also soft & chewy. (Not that that is a bad thing!) It's just that sometimes I want my granola bars crunchy. These bars may not taste just like the true Nature Valley granola bars, but they are slightly sweet with just enough crunch to satisfy my cravings for the originals. :)


Ingredients

1 1/2 c. old fashioned oats
2 Tbsp. rice crispies
3 Tbsp. cornmeal powder
1/4 tsp. salt
1/2 tsp. baking soda
1/3 c. honey
2 1/2 Tbsp. coconut oil
1 tsp. vanilla
2 Tbsp. brown sugar

Directions

 Preheat your oven to 325 degrees. 
Line a 8x8 inch baking dish with parchment paper. Set aside.
In a mixing bowl, combine oats, rice crispies, cornmeal, salt, and baking soda.
In a separate dish, heat honey and coconut oil in the microwave for 10-20 seconds.
Whisk to blend.
Add vanilla and brown sugar to the honey & oil.
Pour over oat mixture and stir until well combined.
Dump into prepared baking dish and press into pan.
Bake 20-30 minutes or until the bars are nice and golden.
While bars are still hot, press them down again, being careful not to burn yourself.
Let them cool about 10-20 minutes, then cut into bars. 
Remove from the pan and let cool completely on a cooling rack.


(Directions with Photos)

 Preheat your oven to 325 degrees. 
Line a 8x8 inch baking dish with parchment paper. Set aside.
In a mixing bowl, combine oats, rice crispies, cornmeal, salt, and baking soda.


In a separate dish, heat honey and coconut oil in the microwave for 10-20 seconds.
Whisk to blend.


Add vanilla and brown sugar to the honey & oil.


Pour over oat mixture and stir until well combined.


Dump into prepared baking dish and press into pan.


Bake 20-30 minutes or until the bars are nice and golden.
While bars are still hot, press them down again, being careful not to burn yourself.


Let them cool about 10-20 minutes, then cut into bars. 


Remove from the pan and let cool completely on a cooling rack.


{These bars can get pretty crumbly around the edges sometimes. No worries. Just gather up the cooled "crumbs" and store them in an airtight container. They are perfect for sprinkling over crockpot yogurt & fresh or frozen berries!}


Check these out!