Search This Blog

Wednesday, June 11, 2014

Strawberry Chimichangas

First of all, the term "chimichangas" in this recipe may be a little deceiving.  I should call it a chimichanga makeover. :)
I don't own a deep fryer. An easy fix (and perhaps a little healthier) is to pull out the largest skillet you have and melt some butter to fry up your "Chimichangas". I love butter! And you still up with some delicious chimichangas without the extra grease! (You're welcome.)


Look at all that deliciousness. 
And it is so easy!!

All you need:

8 oz cream cheese (softened)
1 cup strawberries (sliced and diced)
1 1/2 Tablespoons sugar
6 flour tortillas (8 inch) 
3 Tablespoons butter
Cinnamon sugar (made with 1/4 cup sugar and 1/2 - 1 Tablespoon ground cinnamon)
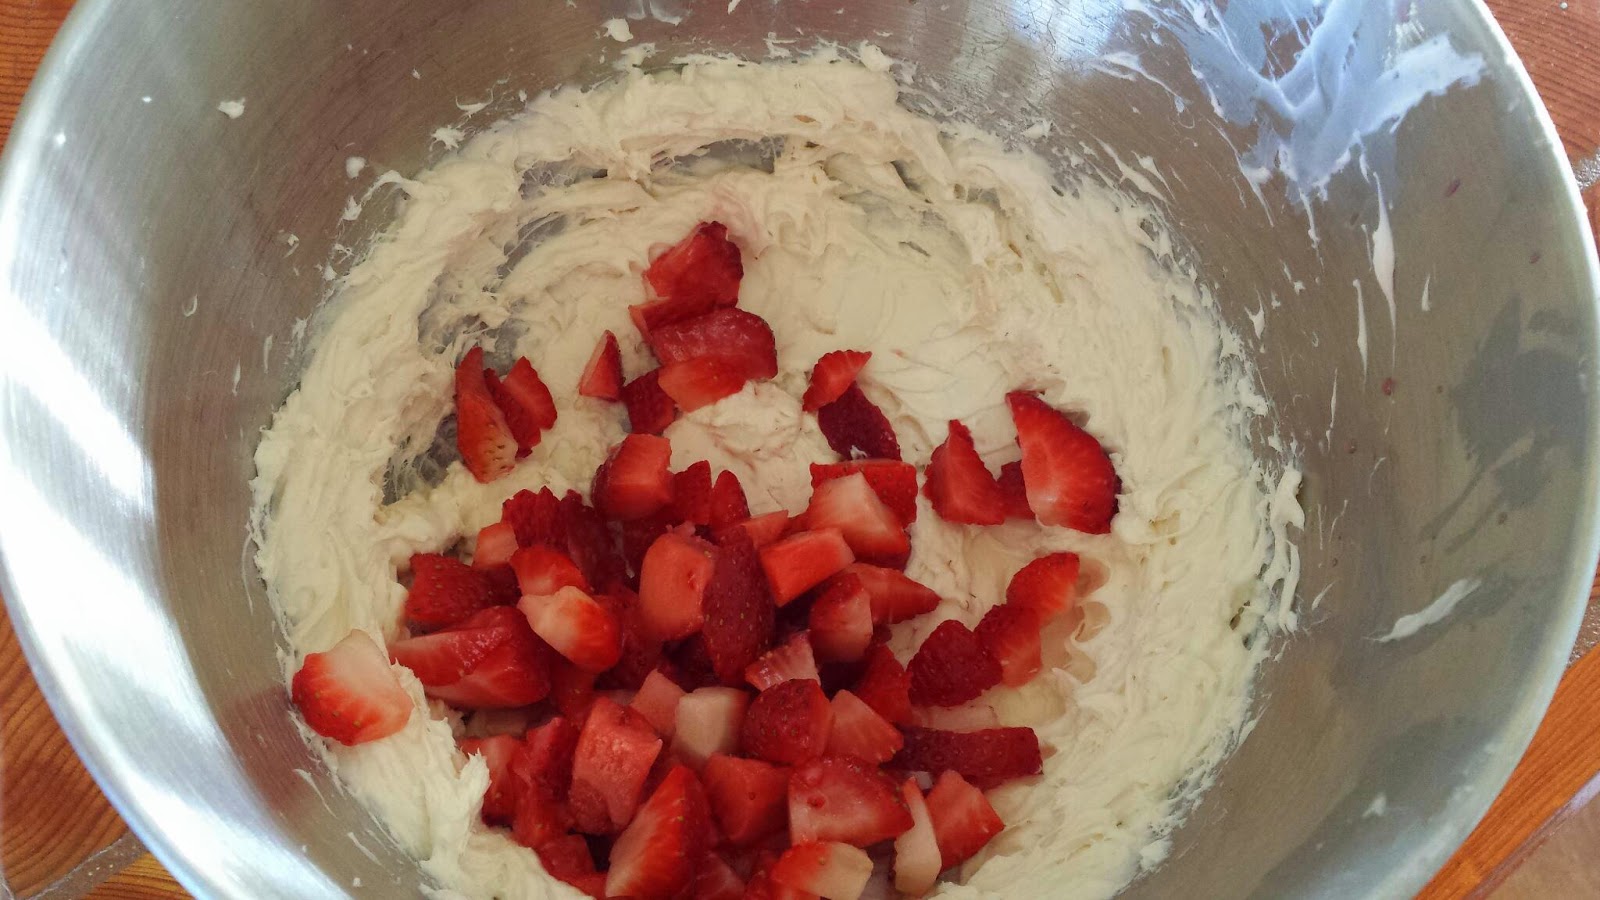

First you need to mix the cream cheese and 1 1/2 T. sugar with a mixer. When it is mixed well, gently fold in the strawberries.

Next you need to mix up your cinnamon sugar. It is best to use a container with a lid. This will make it easier to coat the chimichangas.


Now it is time to fill the tortillas. Fill the bottom third of the tortilla, dividing the cream cheese mixture between the 6 tortillas...


Fold the sides in..


...and roll them up! :)


Now you need to heat the butter on medium-high heat. 
Once it is sizzling hot...


...add the tortillas. 
You will need to rotate them, being sure to brown each side. This will not take long. They will only need a couple minutes on each side. 


When they are browned on each side, place them on a platter lined with a paper towel.


Next transfer them to the container of cinnamon sugar. Place the lid on and give them a gentle shake, being sure they are evenly coated. Transfer to a plate...


...and enjoy immediately while they are still warm. :)


Saturday, June 7, 2014

Summer Vegetable Medley

Recently my family had a very scary experience.  My wonderful father in law had a heart attack, which was completely unexpected.  He is recovering well, but along with rest and exercise (a little contradictory :), he has been put on a strict diet.
Learning new recipes and trying to make healthy choices is becoming fun and interesting to him. In sharing the knowledge he's acquiring, my husband and I are learning some easy, yummy ideas to keep in our refrigerator.  
Not that a heart attack at a young age will necessarily happen to us, but that scare was enough to motivate us to make even small changes if we can. 
So in trying to have healthier alternatives to choose from, I made this vegetable medley.  We think it's very good!  Also, it keeps in the refrigerator for up to a week!  Hopefully it won't last that long. :)


1/2 of a head of broccoli, cut in small pieces
1/2 of a head of cauliflower, cut in small pieces
4 carrots, diced small
1 small onion, diced small
4 stalks of celery, diced small
1/2 container of grape tomatoes
1/2 can of medium black olives
Newman's Own Light Balsamic Vinaigrette 
Balsamic Vinegar

This is so easy to do and so yummy.  Just cut up the veggies and pour approximately 1/2 cup of dressing over the veggies.  I also sprinkle a little plain balsamic vinegar because I like a little tang.  Put in a large container.  Covering it, shake well.  If you need a little more dressing when you serve it, you can always add it then.  


WISHING ALL YOUR FAMILIES HEALTH AND WELLNESS!  Let's not take it for granted!! :)

Tuesday, June 3, 2014

Lentil Chili


As mentioned in a previous post, my father recently had a heart attack.  Since his heart attack he has been on a vegan diet and, so far, has really enjoyed it. To make our meals healthier, my husband and I have experimented with our grub also. 

 It is a little difficult to change up your cooking style when, for me, meat was a priority in every meal; I picked the meat, then decide on the sides. I do believe it will get easier if I stick with it so that is what I intend to do! :)

 Although I was skeptical that chili would be good without ground beef, it was a good thing I gave it try.  This chili was very good.  It didn't even make you miss the ground beef!

I can't say I will give up my meat completely, but I am liking trying new recipes and not always staying in the same "meat & 3" mentality.

A couple adjustments I am going to make next time:

Cut down on the lime
Add pepper
Add a little more chili powder 

but...

WE LOVE SPICES!
(so adjust accordingly)

Lentil Chili

3/4 c. chopped onion
3/4 c. chopped celery
1/2 c. chopped carrots
1 med. chopped pepper
1 T. minced garlic

3 c. low sodium vegetable broth

2 1/4 tsp. chili powder
1/2 tsp. cumin
1/2 tsp. paprika
1/4 tsp. smoked paprika
1/4 tsp. cayenne

1 c. dry red lentils
1- 15 oz can low sodium crushed tomatoes
1- 15 oz can dark red kidney beans, drained and rinsed)

1/2 lime, zested and juiced
salt and pepper to taste


Mix chopped onion, celery, carrots, pepper, and garlic. 


Mix chili powder, cumin, paprika, smoked paprika, and cayenne in a small bowl.  


Gather all ingredients. 


In a large sauce pan, put 1 c. of broth and veggies over med/high heat.  


 Cook until veggies soften, about 5-7 minutes.


Add spices.  Stir.  Cook another minute.


Add lentils, kidney beans, tomatoes, and remaining broth.

Cover and bring to a boil over high heat.

Reduce to med/low and simmer until lentils are soft, approximately 45 minutes.


Stir in lime juice and zest just before serving.

Monday, June 2, 2014

Raspberry Chia Jam

I have another love. (Sorry, hunny.) I'm giddy and excited when I see them, can't wait to mix it up and try something new. It puts a smile on my face when I know that this weird -yet amazing- relationship is perfect. My new love's name?

Chia Seeds.

Yes, I know it's not a typical crush, and no, I'm not leaving my husband for some seeds, but oh, do I love them! Yes, LOVE. Besides the many health benefits I've read about chia seeds, they are just super versatile and fun. They may not be a huge flavor enhancer, but they make texture changes that are truly awesome.


You've already seen chia seeds in my post on Raisin & Almond Crunch Cereal.
You could also add them to the No-Bake Energy Bites, Naked-Inspired Green Machine Smoothie, or the  Fruit Medley Smoothie for an added nutrition boost!

This post, however, will give you another reason to love chia seeds! Not only do they go well in smoothies, cereals, and cookies, but you can also use them to make your very own, EASY, refrigerator jam!!!
Now, this is not your typical jam or jelly with the pectin and granulated sugar where you have to cook it down, then can it, and let it cool. This is a 4 ingredient, 5 minute, super simple fruit spread that is absolutely delicious.

It is perfect to use on homemade toast with regular butter, or any type of nut butter.
You could spread it on a whole grain cracker, or right over your Saturday morning flapjacks.
Maybe stir it into your frozen yogurt, or spread a spoonful over your Homemade English Muffins!


Ingredients

6 oz. carton fresh raspberries, cleaned
1/4 c. water
1 Tbsp. honey
3 Tbsp. chia seeds


Directions

Place your raspberries in a blender.
Add the honey, water, and chia seeds.
Blend well.
Transfer to a jelly jar.
Cover, and place in the refrigerator for at least 12 hours before using.


(Directions with Photos)

Place your raspberries in a blender.


Add the honey, water, and chia seeds.


Lookin' good...


Blend well.


(I didn't do it, but if you'd like the spread to be chunky, you can stir in small pieces of fruit now.)


Pour into a jelly jar.


Cover, and place in the refrigerator for at least 12 hours before using.


After 12 hours, your spread will be ready to use!

The chia seeds will gel up a bit and thicken the "jam" without having to use pectin or any cooking methods! Along with those perks, as well as not adding any granulated sugar, this has got to be one of the healthiest (not to mention easiest!) fruit spreads you can make!


I'm not sure how long this will last in the fridge, but I'm guessing about 7-10 days? We will see. :)

 I'm going to try different types of fruits next time! Maybe a combination of blueberries and raspberries, or strawberries and rhubarb...or blackberry! Ooh, this is going to be fun! :) 


Sunday, June 1, 2014

"Pizza" Portabella Caps

When I was grocery shopping this week, I noticed that the portabella mushroom caps were on sale. My husband hates mushrooms (he actually calls them "the devil's food"), but I love them. My sister posted some Cream Cheese Mushroom Bites that are delicious, so I thought I could use these mushrooms to make those, but when I got home, I realized I forgot to pick up crab meat. So, I changed up my plan and made these "pizzas" instead. 

They were so good, and definitely hit the spot for me! I will for sure be making these again! Probably on a night when Tony is not home, just to be nice. ;)


Ingredients

butter, softened
portabella caps, wiped clean
red onion, sliced
cream cheese
tomatoes, sliced
pepper jack cheese, shredded


Directions

Preheat oven to 350 degrees.
Gently rub the mushroom cap with butter, then flip upside down.
Place thin slabs of cream cheese inside mushroom to fill.
Saute red onion in a little butter until softened.
Place on top of cream cheese.
Top with tomato slices and a little shredded cheese.
Place on a baking sheet and bake for 15-25 minutes, or until cheese is melted and mushroom is cooked through.
Serve immediately.

**I didn't write the amounts of the ingredients, because I just kinda threw it all together. You may want different amounts of everything, so just make it how you'll like it. I like quite a bit of cream cheese, whereas you may prefer more pepper jack instead....or a lot of both. :)


Preheat oven to 350 degrees.
Gently rub the mushroom cap with butter, then flip upside down.
Place thin slabs of cream cheese inside mushroom to fill.
(I think it would be really good to add some fresh basil, too!)


Saute red onion in a little butter until softened.


Place on top of cream cheese.
Top with tomato slices.


 Add a little shredded cheese.


Place on a baking sheet and bake for 15-25 minutes.


When done, cheese will be completely melted and mushroom cooked through.


Serve immediately.
Yummy! :)


Friday, May 30, 2014

White Chicken and Spinach Lasagna


I am a huge fan of lasagna-- sauce, beef, cheese...the whole works.  I was struggling trying to find some new recipes to try out, and I was voicing my frustration to my sister.  She told me that I should try a White Chicken lasagna.  Having only ever made the tomatoey goodness that is "traditional" lasagna, I was a little skeptical.  
But after having made my meal plan, which looked rather boring and kept repeating with the same ol' same ol', I decided that it wouldn't hurt to give this a go.  
Worth it!! My husband really liked it and the sauce was really yummy.  Next time I make it, I am going to play around with a little more spice and see what I get; for a first time, there was no complaints. :)

White Chicken and Spinach Lasagna

Sauce:
4 T. butter
1 white onion
1 T. minced garlic (we love garlic--I will probably use even more next time.)
6 T. flour
1 c. low sodium chicken broth
2 1/4 cups milk
3/4 teaspoon dried basil (I only had fresh basil so I used 1 T.)
3/4 tsp. dried oregano
1 tsp. salt
1/2 tsp. pepper

Lasagna:
9 lasagna noodles (I boiled them until they were almost ready)
15 oz. ricotta cheese
2 cups prepared chicken chunks
1 pound mozzarella cheese (I used more like 2 lbs.  Don't judge. ;)
1 1/2 c. parmesan cheese (reserve 1/4 c. for the top)
18 oz. fresh spinach (I only used about 12 oz.  My pan was so full, I don't know if I could have even gotten all the spinach it called for in the pan.  Good luck to you.  It does look like a bunch, but it cooks down.
1 T. fresh parsley


Gather all your ingredients for your sauce.  I mixed the broth and the milk together, in case you were wondering where the broth was.  


In a large saucepan, melt butter.  Saute onions for approximately 4 minutes or until translucent and tender. 


Stir in garlic. 


Add flour, stirring constantly.  Allow to cook for about a minute, making sure to continue to stir.


Gradually add the milk and chicken broth while whisking vigorously to make it all smooth.  


Add in the seasonings.  Bring to a simmer.  


Continue to let it simmer, approximately 5 minutes or until it has thickened. 


Gather all your ingredients to layer your lasagna. Don't forget to reserve 1/4 c. parmesan for the top of your lasagna. 


 Start by spooning in 1 1/2 cups of prepared sauce on the bottom of a 9 x 13 pan.


Layer 3 partially cooked lasagna noodles.


Dollop half of the ricotta contents as the next layer. 


Next, spread half of your chicken.


Divide your spinach in half and layer next.


Put on your mozzarella cheese...what the recipe calls for or what you like. :)


Sprinkle on half the parmesan cheese, excluding the reserved amount for the top. 

Carefully press the layer down with your hands.  It almost appears you won't get another layer on there but you will. :)


Place 3 noodles over the top.  Pour half of remaining sauce on top of the noodles.  Repeat layers (remaining ricotta, chicken, spinach, mozzarella, parmesan.)

After completing the layer, put the last 3 noodles on top.  Pour the remainder of the sauce.  Top with reserved parmesan cheese.


Cover with lightly greased aluminum foil.  Bake at 350 degrees for 40 minutes.  Uncover and bake for 15 minutes until bubbly.
(I removed the aluminum foil for the picture so you could see the process. )


At the end, I turned the broiler on to get it a little crispy on the top.  That is obviously optional.


  YUMMY GOODNESS!  ENJOY!


Check these out!